After the Asset Naming Assistant app is installed, all users within your Eloqua instance can access the app.
Admin Settings & Controls #
Oracle Eloqua Assets #
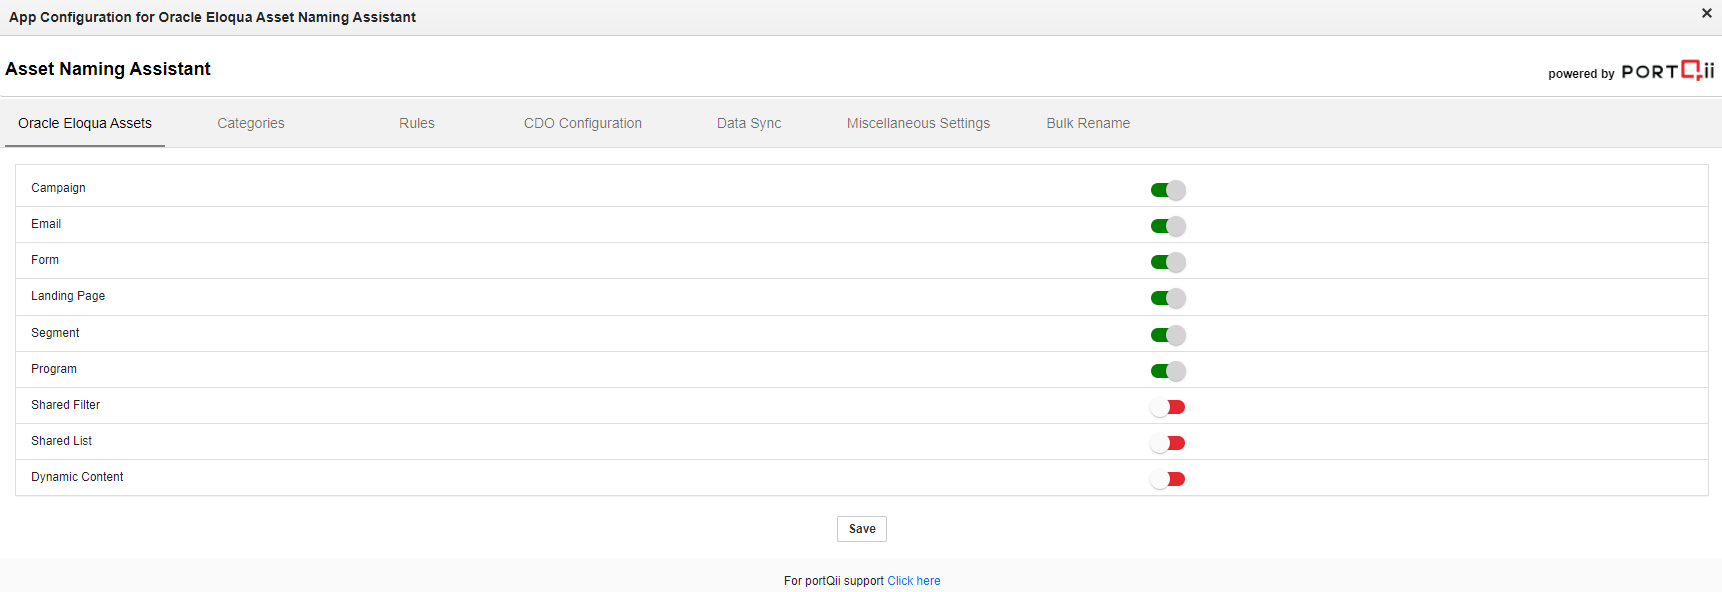
Administrators can choose which assets the Oracle Eloqua Naming Asset Assistant will be used for.
- Click the first tab displayed is the Oracle Eloqua Assets tab. (Users are allowed to create 9 types of assets from the application i.e.: Campaign, Email, Form, Landing Page, Segment, Program, Shared Filter, Shared List, and Dynamic Content. Out of which user can rename only 6 assets as cloud view is for other 3 assets are not permitted. The assets that cannot be renamed from the application are: Shared List, Shared Filter, and Dynamic Content.)
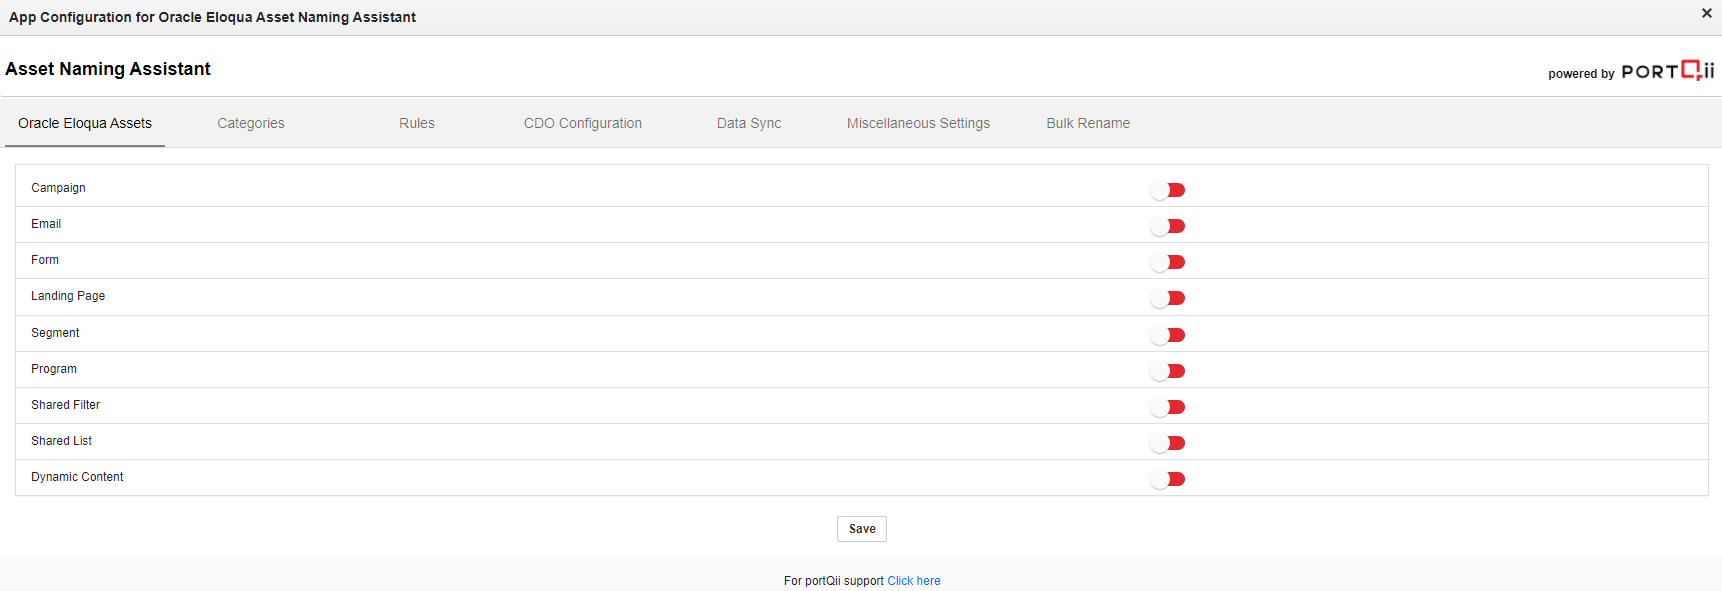
- When we toggle a particular asset to the right, we see a green color on the button which concludes that the asset is enabled from the application to use.
- The admin can enable all the required assets and click on the Save button to save the changes made by the Admin.
- A Saved message is displayed beside the save button displaying the changes are saved.
- Using this tab admin can configure which assets, users can select to create and rename from the application.
Categories #
Administrators can build the list of categories that will appear for marketers to set against assets.
If users are using the app for the first time, then their Categories will be displayed as blank otherwise pre-existing categories are displayed on opening the Category tab.
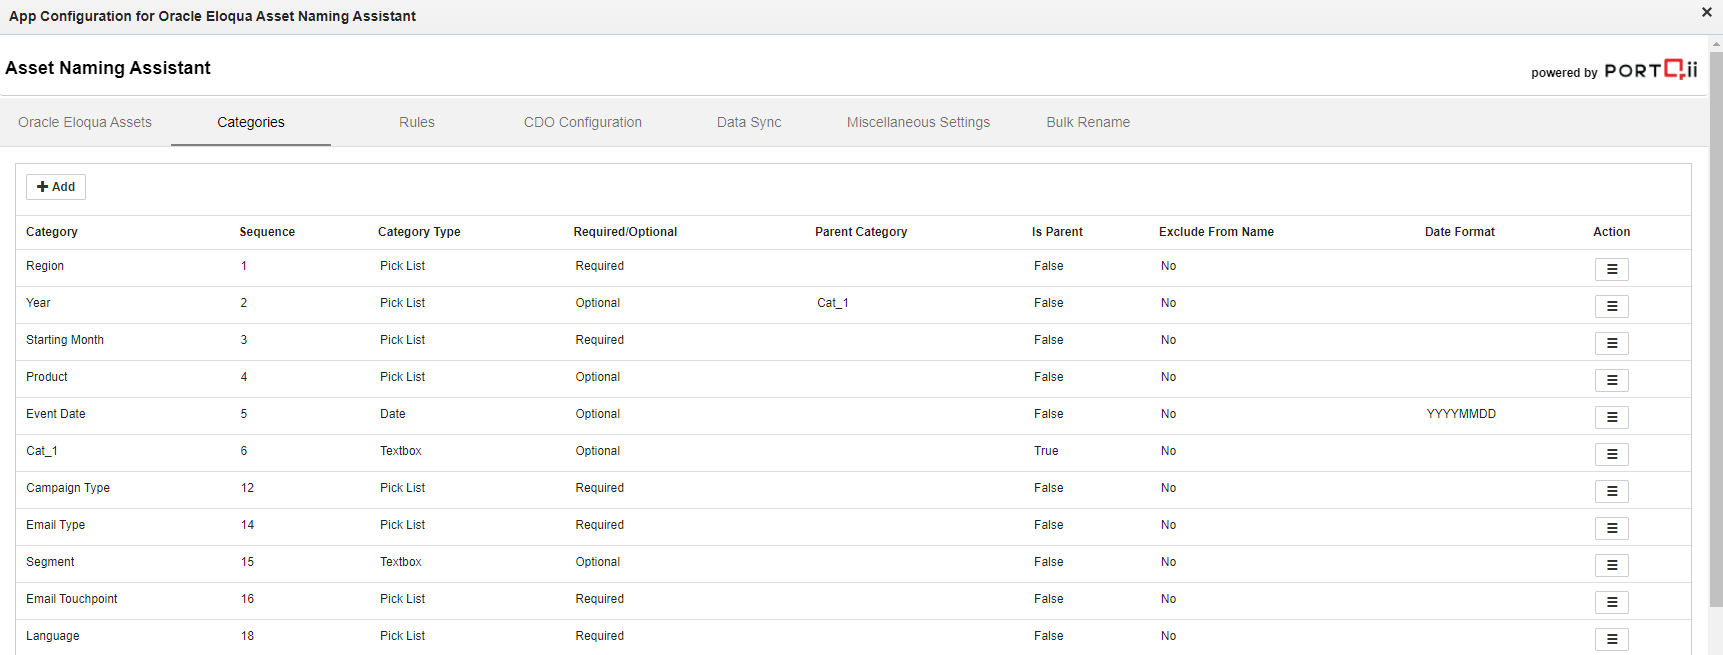
Categories are the part of the asset name that will form the asset name when various categories are enabled.
- Categories can be of 3 types:
- Textbox: where the user can type any value.
- Date: Here user can input only a valid date in the format MMDDYYYY i.e., Month, Day, and Year.
- Picklist: Users can create a picklist of their own using the app or can use the Eloqua picklist.

Adding a Category: #
We can create a new Category by Clicking on the “Add” button situated at the top left corner of the page.
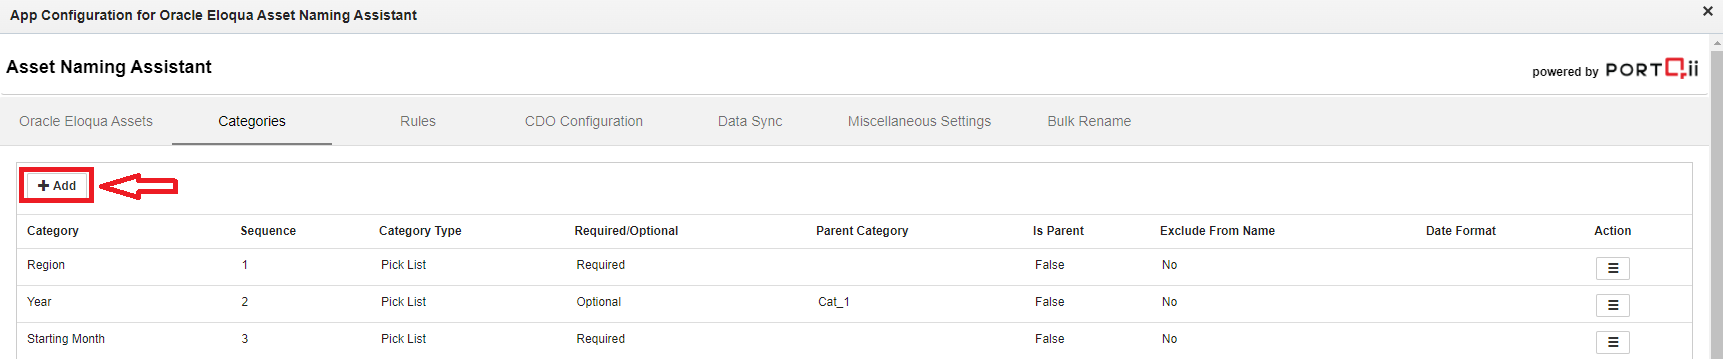
On click of the “Add” button on top of the page, a screen will open, as shown, having the following Fields:
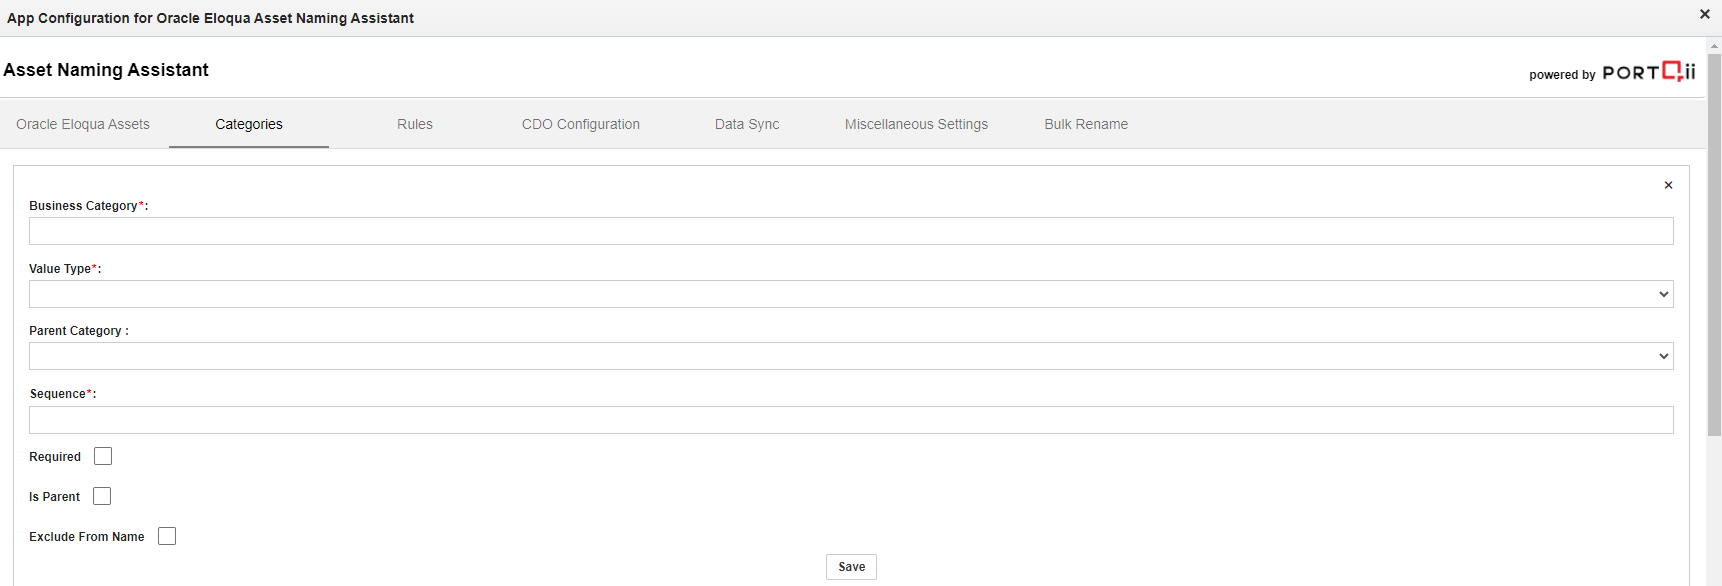
- Business Category: The user can insert the name of the Category under this field.
- Value Type: Out of the three types, users can choose the type of category they want.
- Parent Category: If the user wants some Categories to be a Parent of the current, to be created category then the user can choose that category from the dropdown.
- Sequence: This is the sequence or order of the category in which this category will be displayed in the asset name. All sequences are numbers and should be unique.
- Required: If this category is compulsory to be filled while creating or renaming the asset or it can be kept empty, based on it user can check the checkbox if this category is required to be filled.
- Is Parent: If a user wants this Category as a Parent, then the user can click on the check box, which indicated that this category is a Parent Category now and hence the “Parent Category” field will be set to None.
- Exclude from Name: If users have some categories that they want to use in Custom Objects mapping or in Campaign field sync mappings but not in the asset name while creating or renaming the asset, then the user can click on this field to enable it.
Now when the user has filled all the fields then click on the “Save” button.
A “Saved” message in green color will be displayed.
Now the newly created category will be displayed with all the previously created categories, below the “Add” button in the order of the Category Sequence.
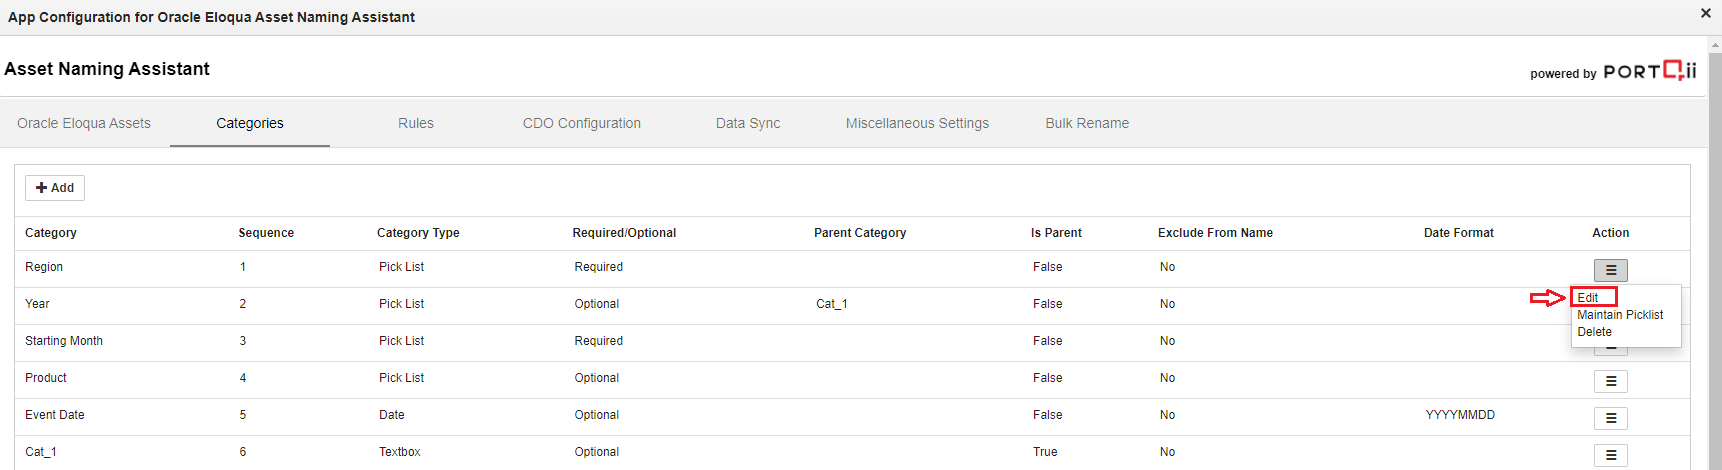
Editing a Category: #
Users make changes in the category by the following steps:
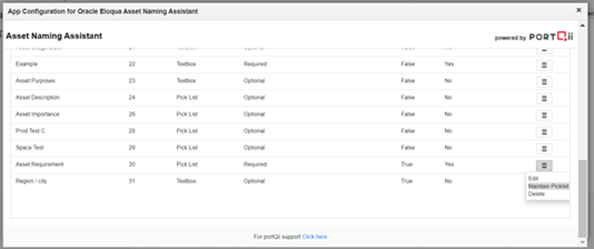
- From the table displayed, there is an Action column at last.
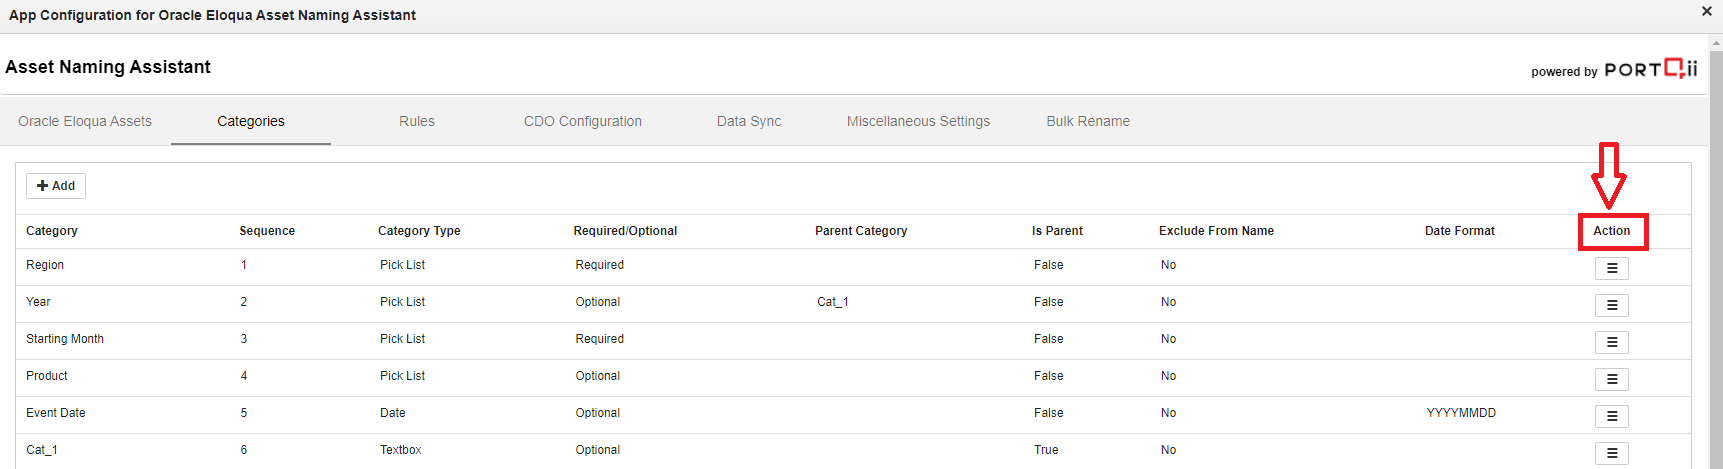
- Go to the Action column for the Category that the user wants to edit.
- A hamburger icon will be displayed, click on it.
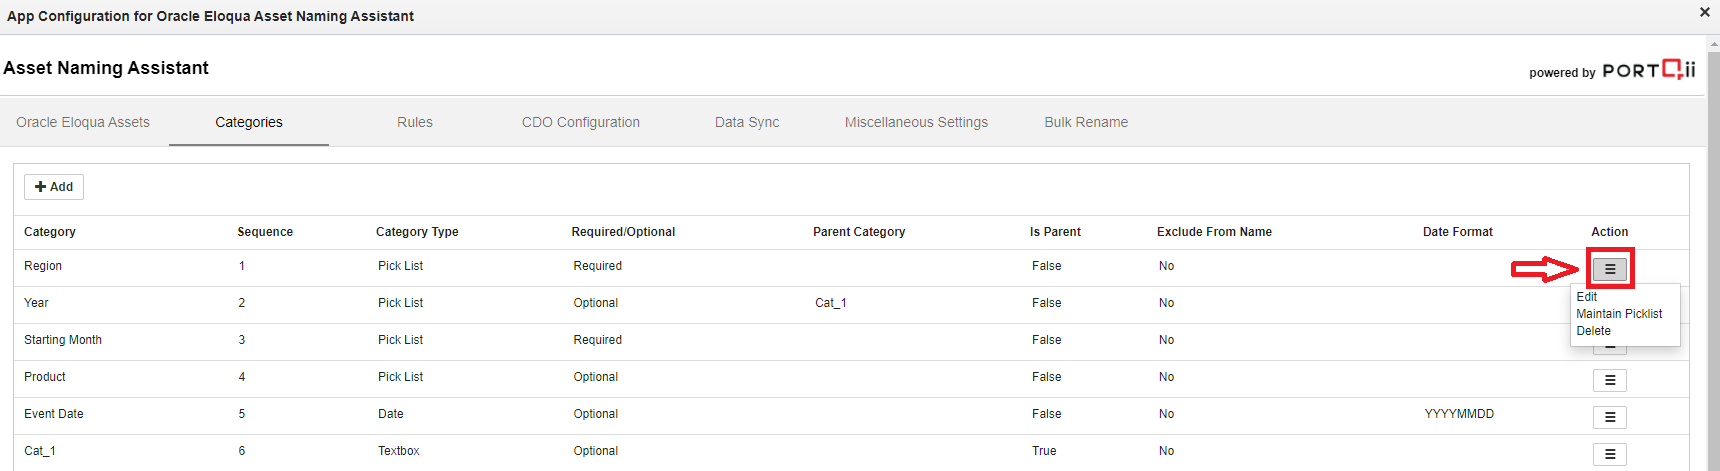
Two options appear upon click of the hamburger icon or three options appear if the Category Type is Picklist.
The functionality of each Option:
- Edit: To edit each field of the category, click on this option.
- Maintain Picklist: If the category type is a Picklist, the user will see this option.
- Delete: If this category is no longer useful user can delete the category by clicking on the Delete option.
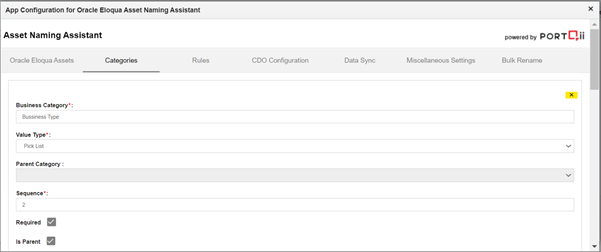
On top of the page edit screen is displayed
The Fields here are the same as that were while Adding the Category.
All the current values for the category are prepopulated.
If the user wishes to change the Sequence of the category, then the user can enter only that Sequence that is not already used.
After making the changes in the fields user can do a click on the Save button so that the edited changes are Saved.
A Saved message in green color is displayed indicating user’s changes are Saved.
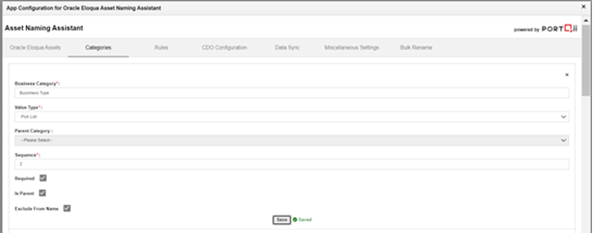
If the user does not want to make any changes in the fields then the user can simply click on the cross X button which is on the top of the edit screen.
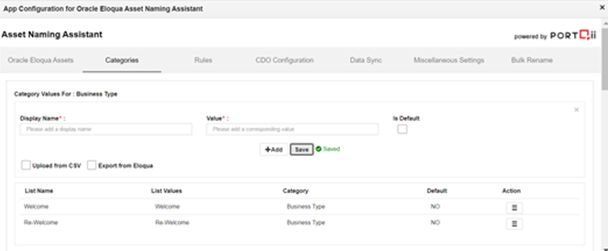
On click of Maintain Picklist:
If the category has some picklists, then they will be displayed else if the Category is new, the user will have no pre-existing Picklists so the user will see a screen like this:
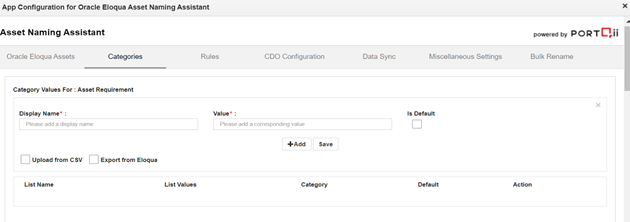
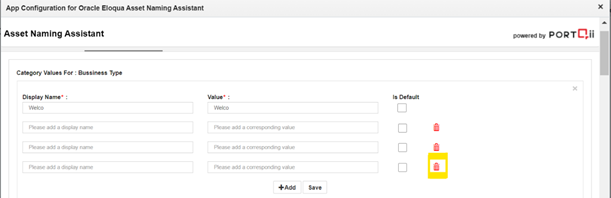
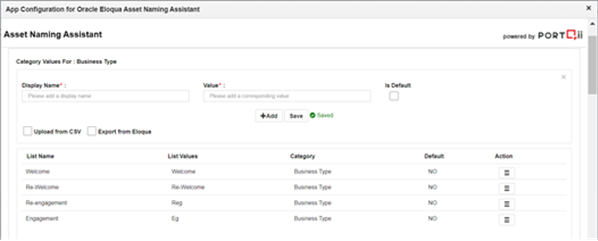
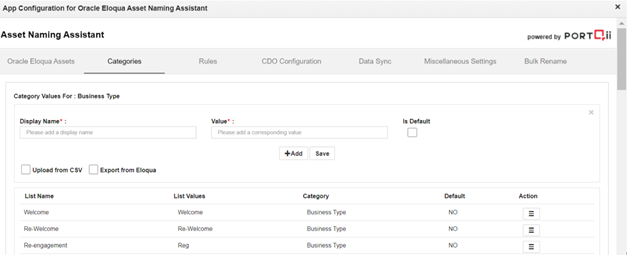
Category Values for: (Category Name) #
- Display Name: The name that will be displayed for the picklist.
- Value: the value of the picklist that will be used in the asset name.
- Is Default: If the checkbox is checked then this value of the picklist will be on top of the page
Adding a Picklist: #
If the user wants to create their own picklists these steps can be followed:
Display Name: Start typing the “Display Name” and “Value” for the picklist will also get auto typed. Change the “Value” if needed.
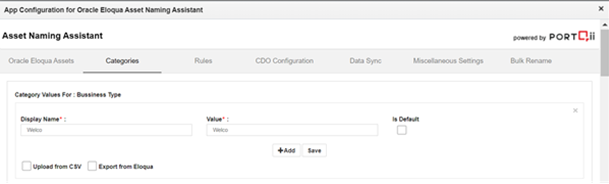
Is Default: If the user wants to have this picklist’s value as default, then check on the checkbox.
Add: If the user wants to upload multiple picklist values at once, click on the “Add” button. A screen will appear as shown
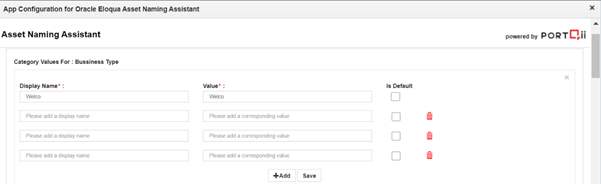
Now add multiple values users want to add to the picklist.
Users can delete the extra Picklist field boxes (if any) by clicking on the red-colored icon of the box as shown:
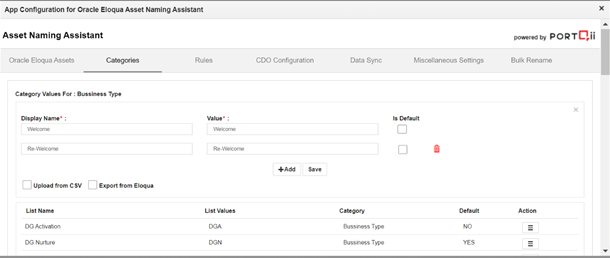
Then click on the “Save” button. A Saved Message will appear indicating your changes are saved and the picklist values will be displayed as shown:
Upload from CSV: #
If the user has a record of picklists in a CSV file, then the user can upload the CSV files to use the picklists for naming the Assets.
The steps to upload a CSV file are as follows:
- Click on the checkbox to the left of “Upload from CSV”. A screen as shown will be displayed
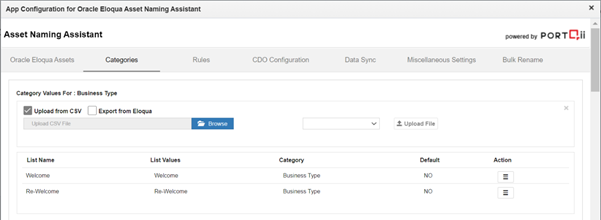
Now click on the Browse button. A screen displaying all CSV files on the system will appear before the user.

- Choose the CSV file that contains picklists values and click the Open button.
- Now the name of the user’s selected CSV file will be displayed as shown:
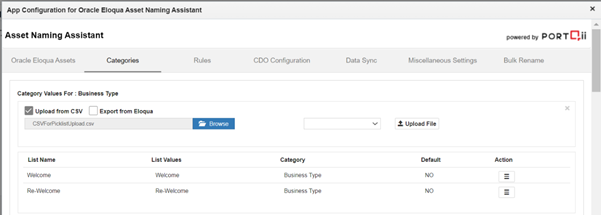
- Now from the dropdown besides, choose one option from Append and Overwrite.
- Append: Using this option, the users’ Picklists from the file are added to the current values of picklists.
- Overwrite: Using this option all pre-existing picklist values are removed and picklist values just from CSV files are saved.
- If none of the options is selected, then by default Append is done.
- Now click on the “Upload File” button that is to the right of the dropdown.
- The picklist values from the file will now be saved and displayed as shown.
These picklist values will now be used for naming the Asset.
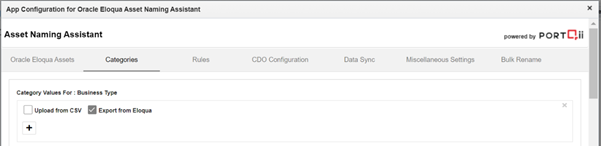
Export From Eloqua: #
If the user wants to use a picklist created in Eloqua, then this can be done in the following steps:
- Click on the checkbox beside “Export from Eloqua”, a screen will appear as shown:
- Now click on the + Icon
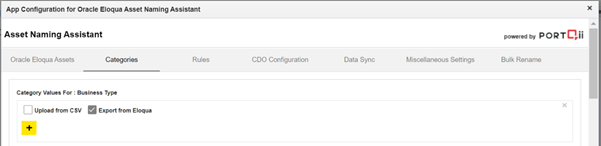
- A screen displayed below will be displayed.
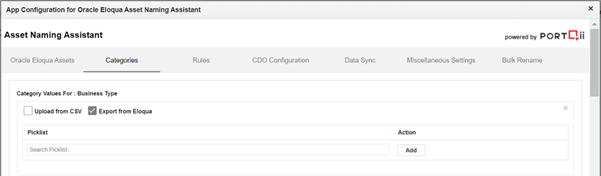
- Inside the “Search Picklist” box type at least 3 characters to search for your Eloqua Picklist and select the one that matches your requirement.
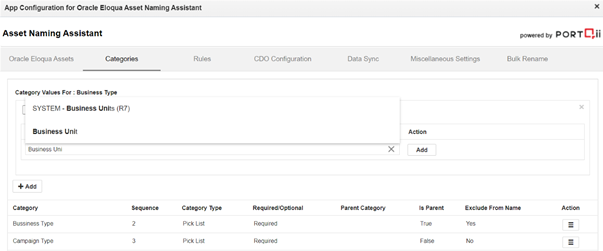
- Or if you have selected a wrong Picklist then click on the X as shown below and type the name of Eloqua Picklist you want to search for.
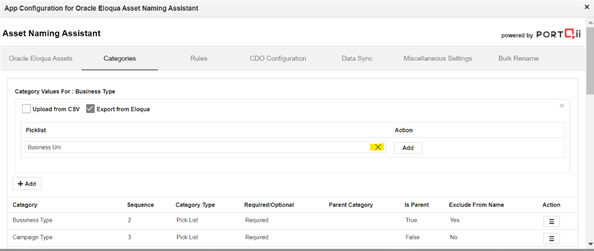
- When you have selected the Eloqua Picklist you want to use then click on Add button.
- A Saved message will be displayed, and the picklist selected by you will be displayed below as shown.
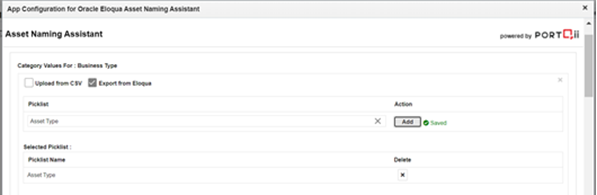
- Now your selected picklist is enabled for the naming of Assets from the application.
- Or if you want to choose another picklist you can click on the cross below Delete and search again and add the picklist.

If Export from Eloqua is checked then the user’s picklist created in the app will not be used. so it concluded that either user can use the Picklist from Eloqua or the Picklist values that they created using the application both cannot be used together.
Disabling Export from Eloqua Picklist: #
If users wish to use the Picklist values created by them then they simply need to uncheck the checkbox of Export from Eloqua and now the user’s created Picklist will be used for naming of Assets.
Rules #
Choose which Business Categories get applied to various Assets. Only the assets that were defined during the earlier configuration will be displayed. Administrators can also configure the separation character that gets inserted when the name is applied to an asset. Option to append an Epoch timestamp to the name can also be configured by Administrators. This will to guarantee uniqueness to the name.
Admin users can add rules using the following steps:
- Click on the Rules tab.
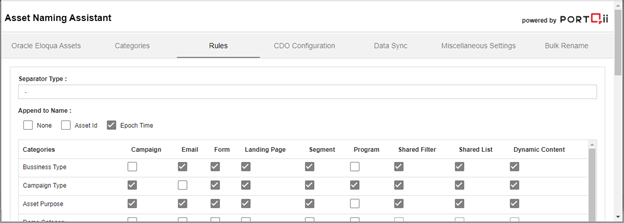
- Users can add Asset Id or Epoch time on each name created using asset naming with separator specified in the text box.
- Adding Epoch timestamp to every name saved by this application. This will ensure uniqueness to the name
- Users can see all enabled asset types in the grid.
- This grid allows the Administrator to relate Business Categories to Oracle Eloqua Assets. Choose which business categories are going to be available against which asset type in Oracle Eloqua
- Click the “Save” button to apply the changes.
Exclusion Criteria for Asset Rename: #
If Administrators want to disable rename of certain assets like asset name start with some text. Then users can use this feature to disable rename assets using Asset Naming.
Steps to follow to disable rename of asset:
- Click the Rules tab.
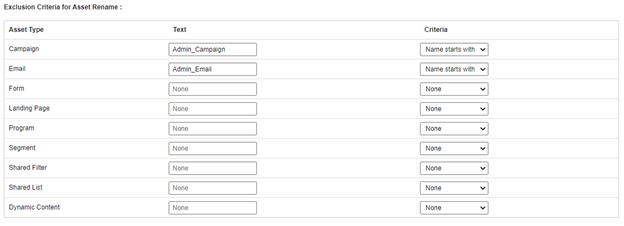
- Scroll down to “Exclusion Criteria for Asset Rename”
- Administrators can see all asset types that are active
- Users can enter text which they want to disable rename
- Select which criteria like “Name start with”
- Click the “Save” button to apply the changes.
CDO Configuration #
Asset Naming allows users to add system category and Business category values to Eloqua Custom Data Object using CDO Configuration. This feature will add mapped category values CDO on each created or updated asset using Asset Naming.
Users add Category values to custom objects by the following steps:
- Click the CDO Configuration tab.
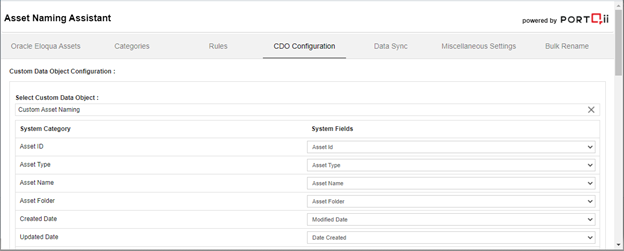
- Search Custom Data Object name and Select CDO.
- Users can add 2 types of data here:
1. System category: Asset Id, Asset Name, Asset type, Asset Folder, Created By, Updated At.
2. Business category: Category created by admin User. - Users can map category to CDO fields using the dropdown on each category field
- Click the “Save” button to apply the changes.
Map Tags to CDO #
Admin can also choose to save the Tag names to the CDO, by configuring it on the CDO Configuration tab.
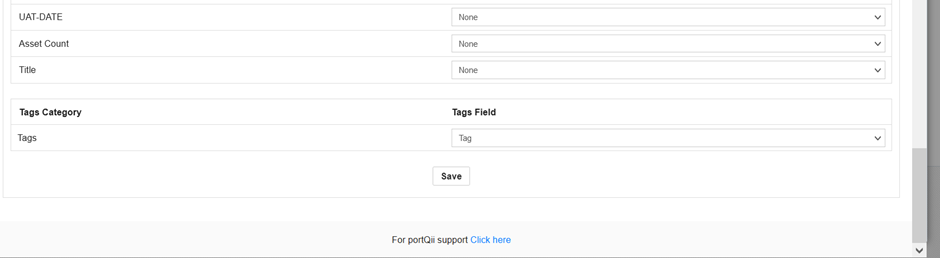
Scroll down to the Tags Category and chose the CDO field from the dropdown to store the Tag names added to the assets and save. Create a text field on the CDO to hold the Tags if relevant field does not exist.
When multiple tags are added to an asset then those will be separated by a coma ( , ) while mapping it to the CDO field as shown in below screenshot.
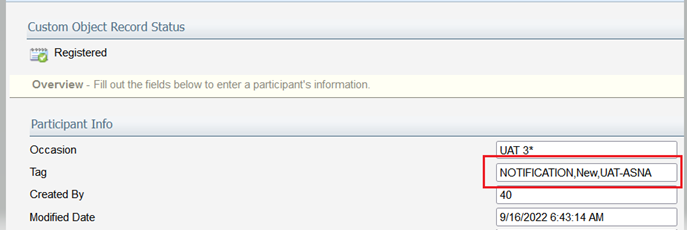
Tags will be added to the CDO record when the asset is created and updated.
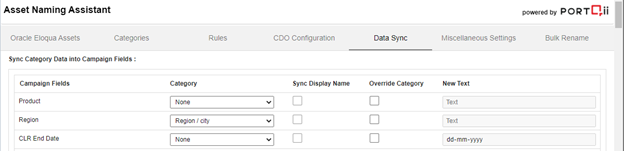
Data Sync #
This feature can be used to add campaign values to campaign assets when a new campaign is created. Values can be added from category values like Date, Text, and Picklist. You can override the category with some Content text.
Configuration: #
The data sync feature can be added in the following manner:
- Go to the Asset Naming Application Admin Configuration page.
- Switch to the Data Sync tab.

- Go to the campaign field which needs to populate on create. Select a category to update the value. Make sure that the Campaign field and category data type are matching.

- Click on the save button to save changes.
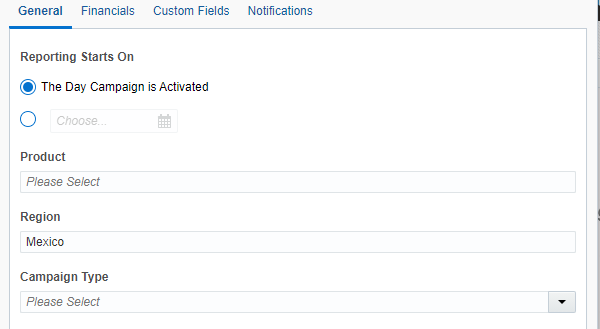
- Create campaign assets using Asset Naming App. Once the Campaign is created mapped data sync field will be updated with mapped category values
- If the user wants to update specific text for the campaign field, Check the “Override Category” check box and add text which needs to be populated
- Click on the save button to save changes
Miscellaneous Settings #
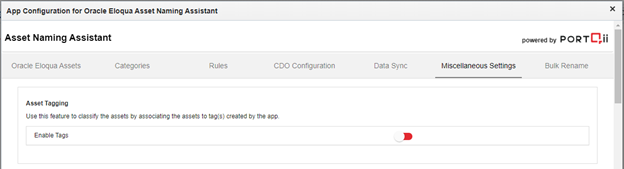
Asset Tagging #
Tags can be attached to any asset for identification, tracking, and maintaining assets.
Configuration: #
The tagging feature can be enabled/disabled in the following manner:
- Go to the Asset Naming Application Admin Configuration page.
- Switch to the Miscellaneous Settings tab.
- Enable Asset Tagging feature.
Create Copies #
Configuration: #
The Create Copies feature must be configured on the application’s Admin Configuration page by the users who have Admin access:
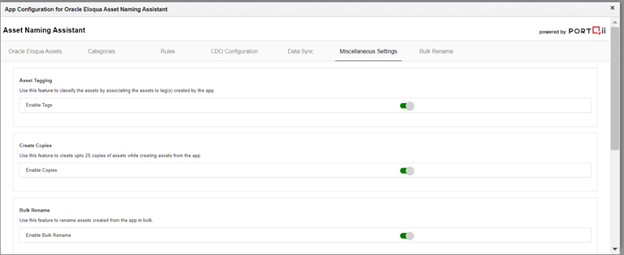
The Create Copies feature can be enabled/disabled in the following manner:

- Go to the Asset Naming Application Admin Configuration page.
- Switch to the Miscellaneous Settings tab.
- Proceed to Create Copies and enable the toggle to the right so that it looks green, indicating the feature is turned on for your instance.
Bulk Rename #
Bulk Rename is a helpful feature when it comes to renaming assets in a large volume. Bulk Rename provides users the capability to rename those assets created by the Asset Naming Assistant application in bulk. This feature is available only for Business Categories of type Textbox and Picklist.
Configuration: #
The Bulk Rename feature must be configured on the application’s Admin Configuration page by the users who have Admin access:
- Go to the Asset Naming Application Admin Configuration page.
- Switch to the Miscellaneous Settings tab.
- Proceed to Bulk Rename and enable the toggle to the right so that it looks green, indicating the feature is turned on for your instance.
- After enabling the feature, the user will see the tab Bulk Rename to the right of the Miscellaneous Settings tab.
- Now the Bulk Rename feature is enabled for use.
Campaign Email Testing #
- Go to the Asset Naming Application Admin Configuration page.
- Switch to the Miscellaneous Settings tab.
- Enable Campaign Email testing
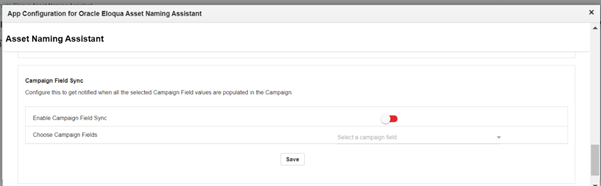
Campaign Field Sync #
The Campaign Field Sync feature must be configured on the application’s Admin Configuration page by the users who have Admin access:

The Campaign Field Sync feature can be enabled/disabled in the following manner:
- Go to the Asset Naming Application Admin Configuration page.
- Switch to the Miscellaneous Settings tab.
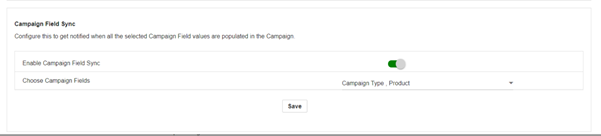
- Proceed to Campaign Field Sync and enable the toggle to the right so that it looks green, indicating the feature is turned on for your instance.
- Select the campaign fields that you want to get notified of.
- Click on the Save button.
- Now the Campaign Field Sync feature is enabled for use.

Asset Tagging #
Tagging the Assets: #
Tags can be attached to any asset for identification, tracking, and maintaining assets.
Configuration: #
The tagging feature can be enabled/disabled in the following manner:
- Go to the Asset Naming Application Admin Configuration page.
- Switch to the Miscellaneous Settings tab.
- Enable Asset Tagging feature.

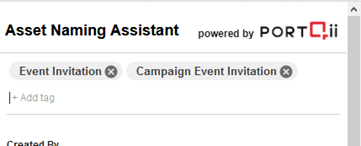
Adding Tags to an asset: #
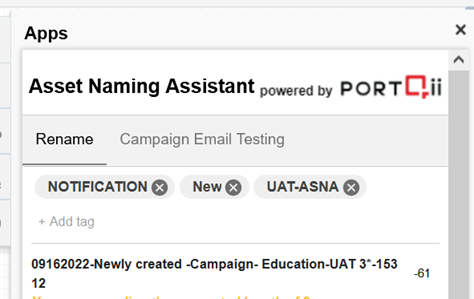
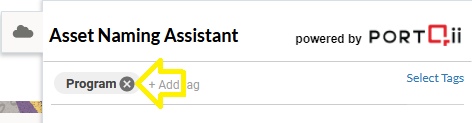
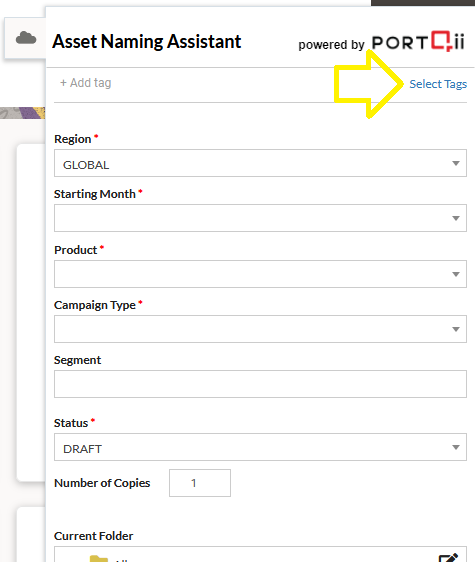
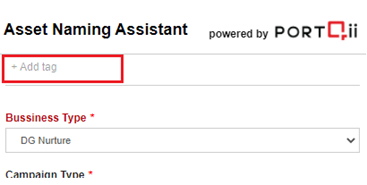
- Click on the + Add tag
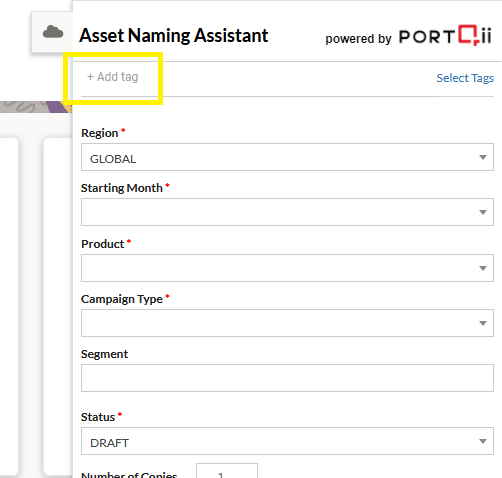
- Tags are now enabled with ‘Type Ahead’ – so, try typing a few letters – we will see a drop-down of best matches:

Choose the applicable one from the drop-down.
There is another way to add Tags, and that is by clicking on ‘Select Tags‘

This displays all the tags that were created,
So filter the ones that are relevant by typing a few letters in the search input box:
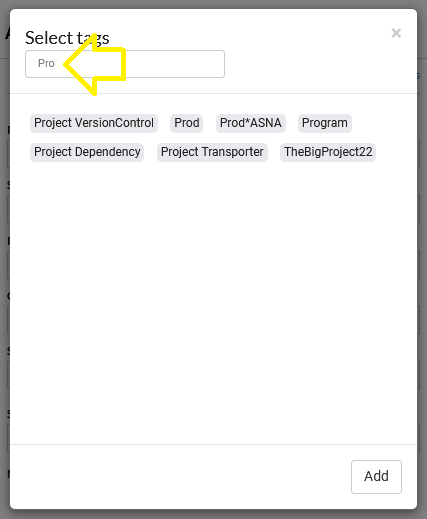
We can select multiple tags before clicking on the Add button.
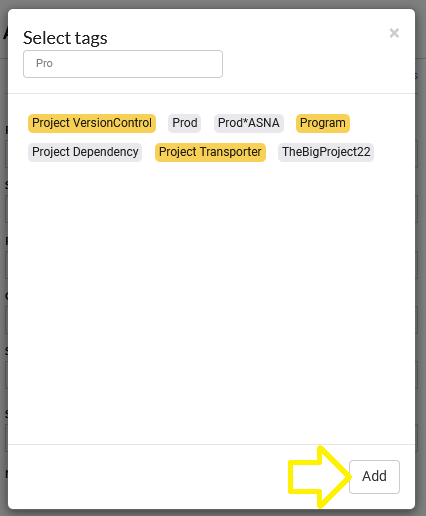
If you chose the wrong one, you can x out the tag:
NOTE: These tagging interfaces (to add/remove tags) are also available for existing assets.
Managing Tags: #
- Click on the Menu App – Asset Naming Assistant

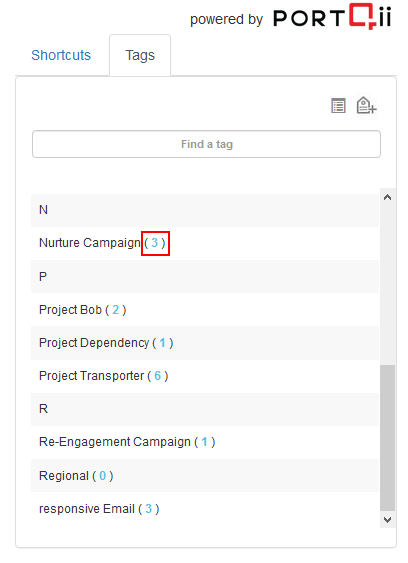
- To View all the existing Tags, click on the Tags tab. To search a specific Tag from the list, the user can type the Tag Name/s in the ‘Find a Tag’ filter search. Multi-tag search feature has been enabled. This means the user can type 2 or more tags and get the search results.
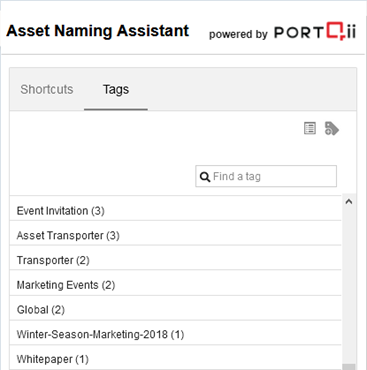
- To View the assets associated with a particular Tag, click on the tag name.

- List of assets that are attached to a particular tag is displayed below. Click on the asset to open that asset.

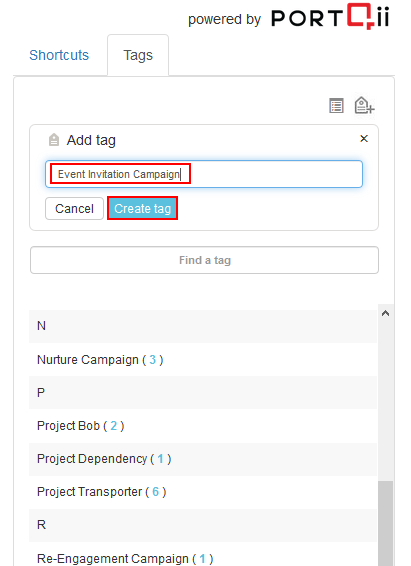
- To create a new Tag, click on the below-shown icon. On hover over the icon, ‘Create a tag’ is displayed.
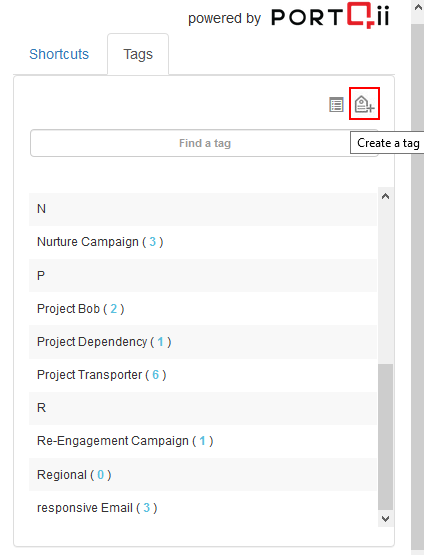
- Add the new Tag and click on the ‘Create tag’ button.

- New Tag can also be created along with the asset. Click on any asset through the Asset Naming Assistant. To add a new tag and associate with the asset click on


- Multiple tags can be Added to an asset (apart from existing tags).
- To Remove Tagging from an asset click on X in the tag
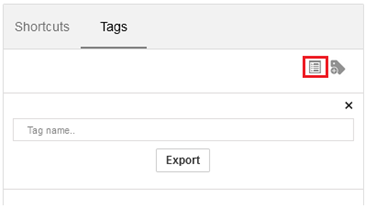
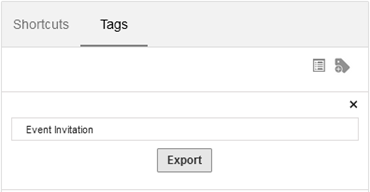
- For reporting purposes, the assets associated with a particular tag can be exported to an Excel sheet. Click on the icon as shown below. On hover over the icon ‘Export, a tag report’ is displayed.

- Type the Tag name and click Export

- The report shows all the assets associated with the ‘Event Invitation’ Tag.

Create Copies #
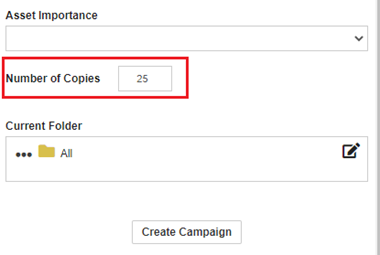
This feature can be used to create multiple copies of assets while creating assets using asset naming. Creating copies are limited to 25 copies.
Configuration: #
The Create Copies feature must be configured on the application’s Admin Configuration page by the users who have Admin access:
The Create Copies feature can be enabled/disabled in the following manner:

- Go to the Asset Naming Application Admin Configuration page.
- Switch to the Miscellaneous Settings tab.
- Proceed to Create Copies and enable the toggle to the right so that it looks green, indicating the feature is turned on for your instance.
Create Copies Usage: #
- After the user has enabled the feature. Users can see the option to add a number of copies when creating assets.

- With one click of creating asset button. The user will get the following response, also the user will receive an email confirmation once create copies is complete.
Bulk Rename #
Bulk Rename is a helpful feature when it comes to renaming assets in a large volume. Bulk Rename provides users the capability to rename those assets created by the Asset Naming Assistant application in bulk. This feature is available only for Business Categories of type Textbox and Picklist.
Configuration: #
The Bulk Rename feature must be configured on the application’s Admin Configuration page by the users who have Admin access:

- Go to the Asset Naming Application Admin Configuration page.
- Switch to the Miscellaneous Settings tab.
- Proceed to Bulk Rename and enable the toggle to the right so that it looks green, indicating the feature is turned on for your instance.
- After enabling the feature, the user will see the tab Bulk Rename to the right of the Miscellaneous Settings tab.
- Now the Bulk Rename feature is enabled for use.
Renaming Assets #
The Bulk Rename feature is divided into 2 parts, “Rename Textbox Category” and “Rename Picklist Category”. Following are the steps to be taken to initiate a Bulk Rename transaction for each type:
- Rename Textbox Category

- Here users can search and rename the assets where the Business Category is of type Textbox.
- The user can select a particular Business Category to rename from the category dropdown, select the asset type, and type the keyword that they want to replace in the asset name, and press enters or click on the search button.
- The keyword entered must be an exact match to the term in the name that is to be replaced.
- A list of matching assets will be displayed.
- The user can then choose the asset/assets they want to rename from the table displayed, by clicking on the respective checkbox.
- The user can also click on “Select All Assets” if all the assets are to be renamed.
- Then users can type the Replace term, that they want to replace the search term with.
- The “Rename Selected Assets” button is enabled only when the user has selected any asset/assets to rename and has entered a Replace text.
- Users can click on the “Rename Selected Assets” button to rename the selected assets.
- Users will see a notification on the screen and will be notified by an email sent to their registered Eloqua email address once all the selected assets have been renamed.
- Users can continue renaming other categories by using the Reset button.
- Rename Picklist Category

- Here users can search and rename the assets where the Business Category is of type Picklist.
- The procedure to search and list the assets to be renamed is the same as that mentioned for the renaming of the textbox category.
- For the Replace term, the user can select the term that they want to replace the search term with, from the available dropdown.
- This dropdown will contain the other values from the same picklist that was selected by the user as the Business Category to be renamed.
- The “Rename Selected Assets” button is enabled only when the user has selected any asset/assets to rename and has selected a Replace text.
- Users can click on the “Rename Selected Assets” button to rename the selected assets.
- Users will see a notification on the screen and will be notified by an email sent to their registered Eloqua email address once all the selected assets have been renamed.
- Users can continue renaming other categories by using the Reset button.
- Additionally, the user can also download a report of the assets to be renamed by clicking on the “Download’ button after selecting one or more assets to rename.
- The generated report will contain the id, type, and name of the assets selected by the user.
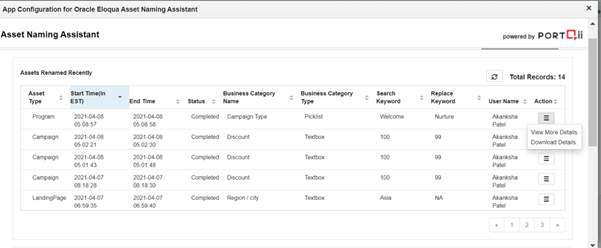
- The user can also see the history of all previous Bulk Rename transactions performed by the application under the “Assets Renamed Recently” table:
- Users can track the status of the Bulk Rename transactions, which can either be “In-Progress” or “Completed”. Users can also view and download additional details of the Completed transactions.
- Users can view the details of all the assets renamed in a transaction using the View More Details button
Notes #
- After renaming, the separator for the asset names will not change.
- CDO configuration and mapping are performed only if an existing CDO configuration was present for the asset before renaming.
- Bulk Rename can be performed only for the Business Category of type Textbox and Picklist.
- Only the Searched term is replaced with the Replace term.
- Renaming the assets does not change the folders they are present in.
- Campaign field mappings are not affected by bulk rename.
- The Search Text used should be an exact match for the term to be renamed.
- The assets that can be renamed using Bulk rename are Campaigns, Emails, Programs, Landing-Pages, Segments, and Forms.
Campaign Email Testing #
Campaign Email Testing is a helpful feature when it comes to testing emails added in Campaigns. Campaign Email Testing provides the user the capability to send emails to multiple contacts from Asset Naming Assistant Application. This feature is available once enabled on the Configuration page.
Configuration #
The Campaign Email Testing feature must be configured on the application’s Admin Configuration page by the users who have admin access:
The Campaign Email Testing feature can be enabled/disabled in the following manner:
- Go to the Asset Naming Application Admin Configuration page.
- Switch to the Miscellaneous Settings tab.
- Proceed to Campaign Email Testing and enable the toggle to the right so that it looks green, indicating the feature is turned on for your instance.

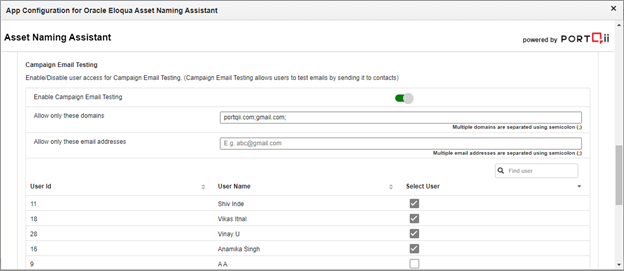
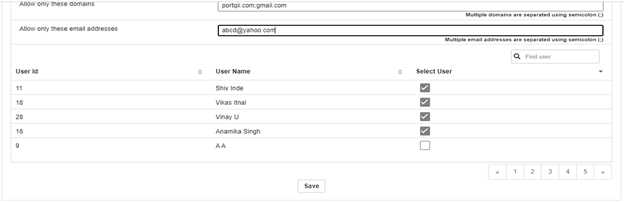
- After enabling the feature, please select users who need to access this feature, click on the save button. (User can filter by Username using “Find User” textbox)

- If the user needs to allow sending emails only to a particular domain, the details for the same should be added in the given domains box. E.g. gmail.com;portqii.com; (Multiple domains are separated with a semicolon) – This indicates that only email addresses having the domain gmail.com or portqii.com will be accepted.

- If the user needs to allow sending emails only to a particular email address, the details for the same should be added in the given email address box. E.g. abcd@yahoo.com; (Multiple email addresses are separated with a semicolon) – This indicates that also, with domains the email address “abcd@yahoo.com” will be accepted.
- After adding domains and email addresses click on the save button.
Campaign Email Testing #
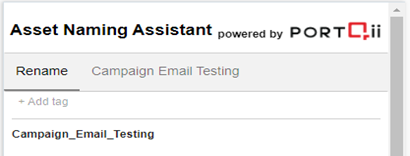
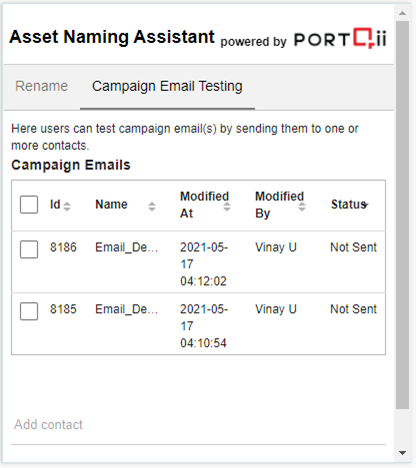
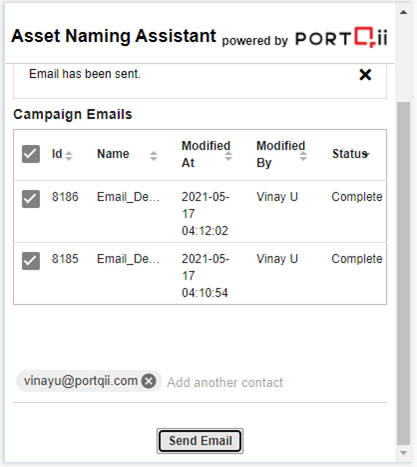
If the feature is enabled, the authorized users will see the tab Campaign Email testing on Campaign Rename Page in Asset Naming Application
the Campaign Email tab, the user will see all emails which are present in the campaign. On opening

- Users can select an email/s by clicking on the respective checkbox.
- Users can also select all emails by clicking on the “Id” checkbox.
- Users can add multiple contacts by searching contacts email in the text box.
- If any domains/emails have been configured on the Admin Configuration page, only those contacts having supported email addresses will be allowed.
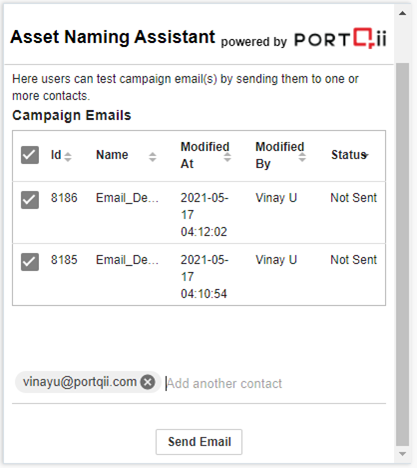
Users can Send Emails to contacts by using the Send Email button.

Once Email deployment is complete, users can see the status of each email in the status column.
Notes #
Only contacts which are having a domain and email addresses in configuration will be displayed while searching contacts
Campaign Field Sync #
The Campaign Field Sync feature must be configured on the application’s Admin Configuration page by the users who have Admin access:

The Campaign Field Sync feature can be enabled/disabled in the following manner:
- Go to the Asset Naming Application Admin Configuration page.
- Switch to the Miscellaneous Settings tab.
- Proceed to Campaign Field Sync and enable the toggle to the right so that it looks green, indicating the feature is turned on for your instance.
- Select the campaign fields that you want to get notified of.
- Click on the Save button.
- Now the Campaign Field Sync feature is enabled for use.
Working with Asset Naming Assistant App #
Asset Naming #
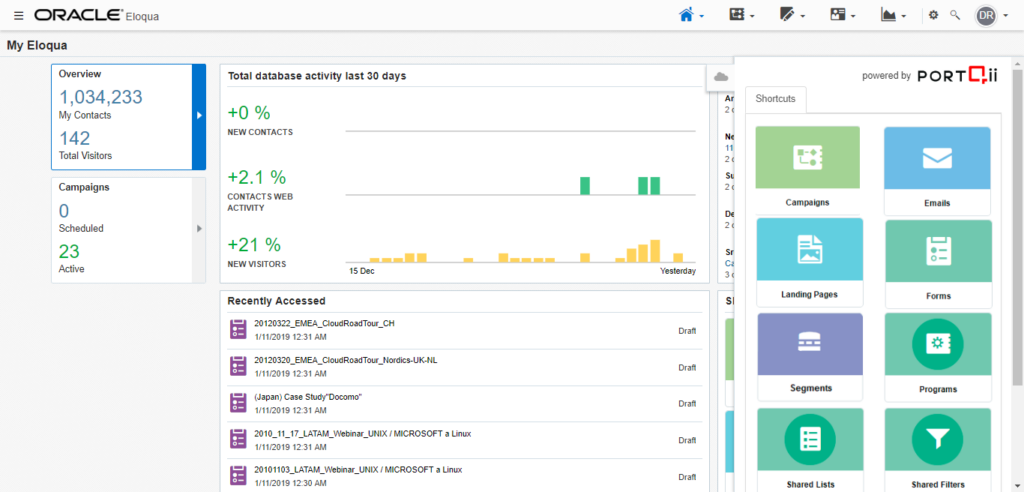
To open Asset Naming Assistant app:
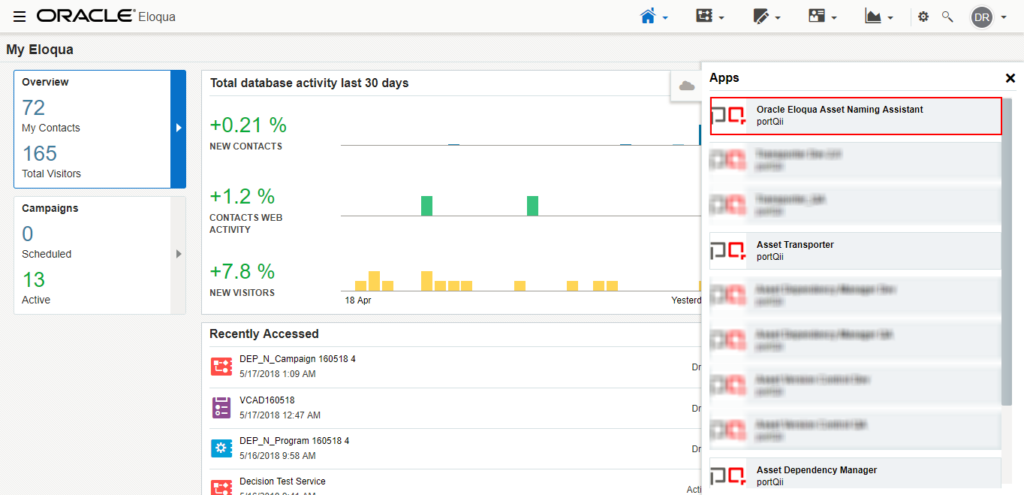
- Click on the Cloud Menu button
- Click on “Oracle Eloqua Asset Naming Assistant”

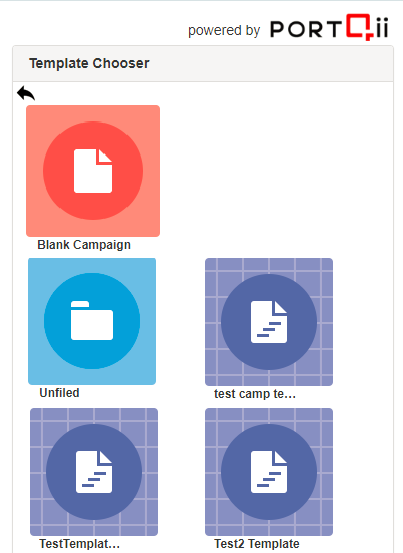
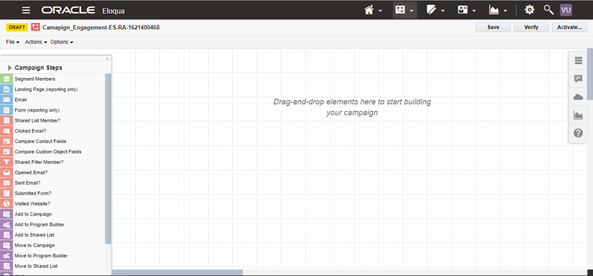
- For creating and naming the asset, open a specific asset that has been configured by the administrator. As an example, a Campaign is used here. Click on Campaigns.
- You can make a selection similar to Eloqua for creating a Campaign. Click on Blank Campaign. If you want to create assets from the template, you can create using the existing template shown below.
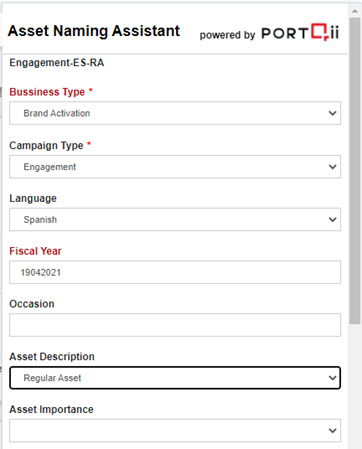
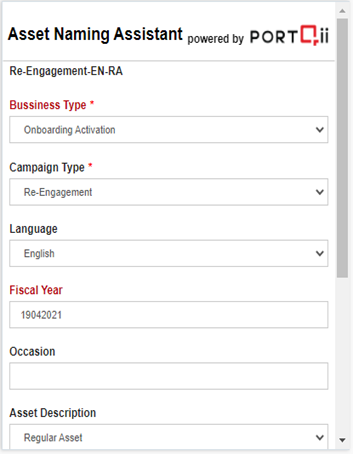
- Fill out the details in the category fields in the following form that gets the name displayed.
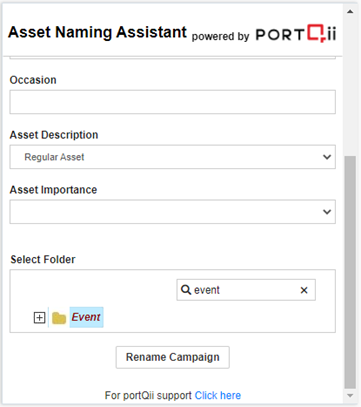
- Users can create assets in specific folders using asset naming.
- Click on the edit icon to get all folders.
- Click on the + icon to expand subfolders.
- Select folder where assets need to be created.
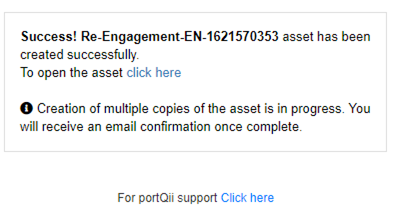
- If the creation and naming of the asset were successful, the following message will be displayed.
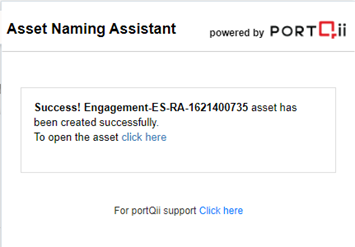
- Click on the link to view the asset.

Asset Renaming #
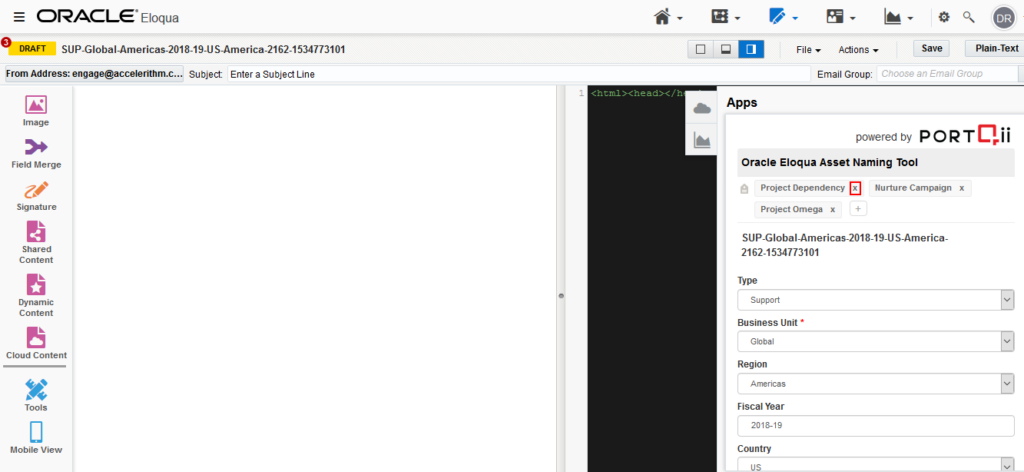
- Open a specific asset of an asset type that has been configured by the Administrator. The Below campaign has been used as an example.
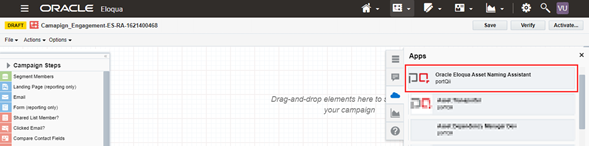
- On opening the campaign, click on the cloud icon and select “Oracle Eloqua Asset Naming Assistant”
- Fill out the details in the following category form that gets displayed.
- Click “Rename”
- If the rename was successful, the following message will be displayed.
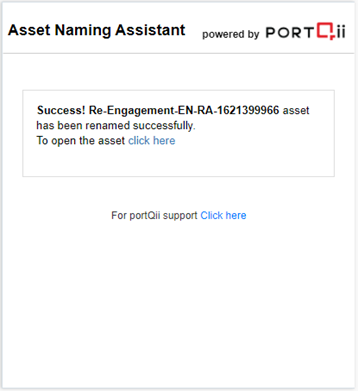
- Click the “Refresh” button on the browser. The page will reload with the new name applied.
- Asset Rename is not supported for Dynamic Content, Shared List, and Shared Filter due to Eloqua Limitations.
Asset Tagging #
Tags can be attached to any asset for identification, tracking, and maintaining assets.
Configuration: #
The tagging feature can be enabled/disabled in the following manner:
- Go to the Asset Naming Application Admin Configuration page.
- Switch to the Miscellaneous Settings tab.
- Enable Asset Tagging feature.
Adding Tags to an asset: #
- Click on the + Add tag

- Tags are now enabled with ‘Type Ahead’ – so, try typing a few letters – we will see a dropdown of best matches:

Choose the applicable one from the dropdown.
There is another way to add Tags, and that is by clicking on ‘Select Tags‘
This displays all the tags that were created.
So filter the ones that are relevant by typing a few letters in the search input box:

We can select multiple tags before clicking on the Add button.

If you chose the wrong one, you can x out the tag:

NOTE: These tagging interfaces (to add/remove tags) are also available for existing assets.
Managing Tags: #
- Click on the Menu App – Asset Naming Assistant
- To View all the existing Tags, click on the Tags tab. To search a specific Tag from the list, the user can type the Tag Name/s in the ‘Find a Tag’ filter search. Multi-tag search feature has been enabled. This means the user can type 2 or more tags and get the search results.

- To View the assets associated with a particular Tag, click on the tag name.
- List of assets that are attached to a particular tag is displayed below. Click on the asset to open that asset.

- To create a new Tag, click on the below-shown icon. On hover over the icon, ‘Create a tag’ is displayed.

6. Add the new Tag and click on the ‘Create tag’ button.
- New Tag can also be created along with the asset. Click on any asset through the Asset Naming Assistant. To add a new tag and associate with the asset click on
- Multiple tags can be Added to an asset (apart from existing tags).
- To Remove Tagging from an asset click on X in the tag

- For reporting purposes, the assets associated with a particular tag can be exported to an Excel sheet. Click on the icon as shown below. On hover over the icon ‘Export, a tag report’ is displayed.
- Type the Tag name and click Export
- The report shows all the assets associated with the ‘Event Invitation’ Tag.

Create Copies #
This feature can be used to create multiple copies of assets while creating assets using asset naming. Creating copies are limited to 25 copies.
Configuration #
The Create Copies feature must be configured on the application’s Admin Configuration page by the users who have Admin access:
The Create Copies feature can be enabled/disabled in the following manner:

- Go to the Asset Naming Application Admin Configuration page.
- Switch to the Miscellaneous Settings tab.
- Proceed to Create Copies and enable the toggle to the right so that it looks green, indicating the feature is turned on for your instance.
Create Copies Usage #
- After the user has enabled the feature. Users can see the option to add a number of copies when creating assets.
- With one click of creating asset button. The user will get the following response, also the user will receive an email confirmation once create copies is complete.

Bulk Rename #
Bulk Rename is a helpful feature when it comes to renaming assets in a large volume. Bulk Rename provides users the capability to rename those assets created by the Asset Naming Assistant application in bulk. This feature is available only for Business Categories of type Textbox and Picklist.
Configuration #
The Bulk Rename feature must be configured on the application’s Admin Configuration page by the users who have Admin access:

- Go to the Asset Naming Application Admin Configuration page.
- Switch to the Miscellaneous Settings tab.
- Proceed to Bulk Rename and enable the toggle to the right so that it looks green, indicating the feature is turned on for your instance.
- After enabling the feature, the user will see the tab Bulk Rename to the right of the Miscellaneous Settings tab.
- Now the Bulk Rename feature is enabled for use.
Renaming Assets #
The Bulk Rename feature is divided into 2 parts, “Rename Textbox Category” and “Rename Picklist Category”. Following are the steps to be taken to initiate a Bulk Rename transaction for each type:
- Rename Textbox Category

- Here users can search and rename the assets where the Business Category is of type Textbox.
- The user can select a particular Business Category to rename from the category dropdown, select the asset type, and type the keyword that they want to replace in the asset name, and press enters or click on the search button.
- The keyword entered must be an exact match to the term in the name that is to be replaced.
- A list of matching assets will be displayed.
- The user can then choose the asset/assets they want to rename from the table displayed, by clicking on the respective checkbox.
- The user can also click on “Select All Assets” if all the assets are to be renamed.
- Then users can type the Replace term, that they want to replace the search term with.
- The “Rename Selected Assets” button is enabled only when the user has selected any asset/assets to rename and has entered a Replace text.
- Users can click on the “Rename Selected Assets” button to rename the selected assets.
- Users will see a notification on the screen and will be notified by an email sent to their registered Eloqua email address once all the selected assets have been renamed.
- Users can continue renaming other categories by using the Reset button.
- Rename Picklist Category

- Here users can search and rename the assets where the Business Category is of type Picklist.
- The procedure to search and list the assets to be renamed is the same as that mentioned for the renaming of the textbox category.
- For the Replace term, the user can select the term that they want to replace the search term with, from the available dropdown.
- This dropdown will contain the other values from the same picklist that was selected by the user as the Business Category to be renamed.
- The “Rename Selected Assets” button is enabled only when the user has selected any asset/assets to rename and has selected a Replace text.
- Users can click on the “Rename Selected Assets” button to rename the selected assets.
- Users will see a notification on the screen and will be notified by an email sent to their registered Eloqua email address once all the selected assets have been renamed.
- Users can continue renaming other categories by using the Reset button.
- Additionally, the user can also download a report of the assets to be renamed by clicking on the “Download’ button after selecting one or more assets to rename.
- The generated report will contain the id, type, and name of the assets selected by the user.
- The user can also see the history of all previous Bulk Rename transactions performed by the application under the “Assets Renamed Recently” table:
- Users can track the status of the Bulk Rename transactions, which can either be “In-Progress” or “Completed”. Users can also view and download additional details of the Completed transactions.
- Users can view the details of all the assets renamed in a transaction using the View More Details button

Notes: #
- After renaming, the separator for the asset names will not change.
- CDO configuration and mapping are performed only if an existing CDO configuration was present for the asset before renaming.
- Bulk Rename can be performed only for the Business Category of type Textbox and Picklist.
- Only the Searched term is replaced with the Replace term.
- Renaming the assets does not change the folders they are present in.
- Campaign field mappings are not affected by bulk rename.
- The Search Text used should be an exact match for the term to be renamed.
- The assets that can be renamed using Bulk rename are Campaigns, Emails, Programs, Landing-Pages, Segments, and Forms.
Campaign Email Testing #
Campaign Email Testing is a helpful feature when it comes to testing emails added in Campaigns. Campaign Email Testing provides the user the capability to send emails to multiple contacts from Asset Naming Assistant Application. This feature is available once enabled on the Configuration page.
Configuration #
The Campaign Email Testing feature must be configured on the application’s Admin Configuration page by the users who have admin access:

The Campaign Email Testing feature can be enabled/disabled in the following manner:
- Go to the Asset Naming Application Admin Configuration page.
- Switch to the Miscellaneous Settings tab.
- Proceed to Campaign Email Testing and enable the toggle to the right so that it looks green, indicating the feature is turned on for your instance.

- After enabling the feature, please select users who need to access this feature, click on the save button. (User can filter by Username using “Find User” textbox)
- If the user needs to allow sending emails only to a particular domain, the details for the same should be added in the given domains box. E.g. gmail.com;portqii.com; (Multiple domains are separated with a semicolon) – This indicates that only email addresses having the domain gmail.com or portqii.com will be accepted.

- If the user needs to allow sending emails only to a particular email address, the details for the same should be added in the given email address box. E.g. abcd@yahoo.com; (Multiple email addresses are separated with a semicolon) – This indicates that also, with domains the email address “abcd@yahoo.com” will be accepted.
- After adding domains and email addresses click on the save button.
Campaign Email Testing #
If the feature is enabled, the authorized users will see the tab Campaign Email testing on Campaign Rename Page in Asset Naming Application

- the Campaign Email tab, the user will see all emails which are present in the campaign. On opening
- Users can select an email/s by clicking on the respective checkbox.
- Users can also select all emails by clicking on the “Id” checkbox.
- Users can add multiple contacts by searching contacts email in the text box.
- If any domains/emails have been configured on the Admin Configuration page, only those contacts having supported email addresses will be allowed.

- Users can Send Emails to contacts by using the Send Email button.
- Once Email deployment is complete, users can see the status of each email in the status column.
Notes #
Only contacts which are having a domain and email addresses in configuration will be displayed while searching contacts
Campaign Field Sync #
This feature can be used when the admins have some internal process of populating the campaign fields in the campaign which the user may or may not be aware of. When the feature is enabled, the user will see the success message after the creation of the campaign but not the link. When all the selected campaign fields, configured from the admin page, are populated in the campaign then the user will get a notification email with the link.
The feature is quite useful when the campaign field values are populated automatically in the campaign. So, the user would not have to keep checking the campaign for its campaign field values being populated.
Configuration #
The Campaign Field Sync feature must be configured on the application’s Admin Configuration page by the users who have Admin access:
The Campaign Field Sync feature can be enabled/disabled in the following manner:
- Go to the Asset Naming Application Admin Configuration page.
- Switch to the Miscellaneous Settings tab.
- Proceed to Campaign Field Sync and enable the toggle to the right so that it looks green, indicating the feature is turned on for your instance.
- Select the campaign fields that you want to get notified of.
- Click on the Save button.
- Now the Campaign Field Sync feature is enabled for use.

When the feature is enabled:
- We have a process that checks for the value in the campaign field every 10 minutes. If all the campaign field values configured by the User on the admin page have been populated in the campaign, the user will receive an email notification, otherwise, the process will recheck for the campaign field values again in another 10 minutes.
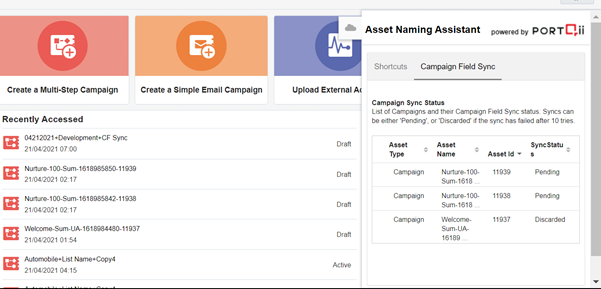
- If campaign field values are still not populated in the campaign even after 10 cycles of rechecking, then that campaign’s field status will be marked as Discarded and the process will not look for campaign field values in that campaign further.
Campaign Field Sync Usage #
- After the user has enabled the feature and selected some campaign fields on the admin page, the user can create the campaigns as usual. After the campaign is created successfully, just the campaign name will be displayed to the user as shown below:
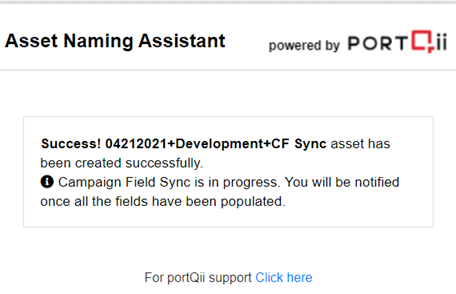
- When the selected campaign fields have been populated in the campaign, the user will get an email notification with the campaign’s details.
- For all the pending or discarded campaigns in which selected campaign fields could not be populated due to some reasons, their list will be displayed to the user on the Campaign view of the application. This list will be user-specific so one user cannot see the pending or discarded assets of another user.
Notes #
- This feature is only available during Create campaign.
- For the creation of assets other than campaign and for renaming the behavior of the application remains the same (when the feature is enabled).
- If the feature the disabled, after successfully creating the campaign, the user will see the link to the campaign.
- When the Campaign Field Sync and Create Copies feature are both enabled, is also enabled, then on creating copies for campaigns, the user will not receive the asset link in the asset creation notification email. The links will be notified to the user once the field syncs are complete.
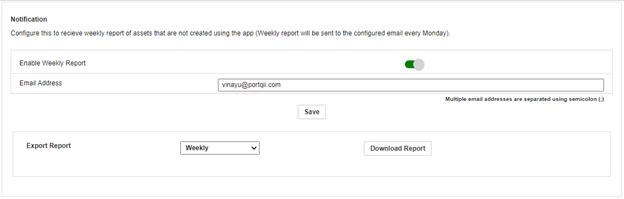
Weekly Report #
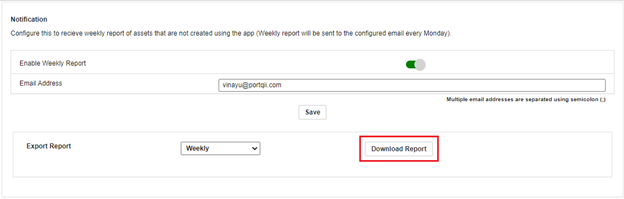
This feature can be used to get weekly reports of assets that are not created using the app. This feature helps in identifying assets which are not using any business rules and categories to define the name of the asset.
A weekly report will be sent to the configured email every Monday
Configuration #
The Weekly report feature must be configured on the application’s Admin Configuration page by the users who have Admin access:
The Weekly report feature can be enabled/disabled in the following manner:
- Go to the Asset Naming Application Admin Configuration page.
- Switch to the Miscellaneous Settings tab.
- Proceed to Notification and enable the toggle to the right so that it looks green, indicating the feature is turned on for your instance.
- Add Email addresses to whom the report has to be sent. Multiple email addresses can be added by separated using semicolon (;)
- Click on the Save button.
Users can also download reports by selecting the option weekly or monthly. Then click on download report to download.