
Overview #
The External Data Intelligence application allows marketers to build a segment for the purposes of adding contacts to a canvas. As an example, the app can be used to feed contacts into an Oracle Eloqua campaign based on a segment definition against a Salesforce instance for a batch and blast campaign or for an always on nurture stream. The segment can connect to any external system configured by the administrator in the configuration section of the application. The user interface to build the segment looks similar to the segment builder inside of Oracle Eloqua to allow for a simple and seamless end user experience.
To create a Campaign using the External Data Intelligence app: #
- Add the External Data Intelligence audience component from the Campaign Steps pane. By default, popular elements are shown. To view all the available elements, click the Campaign Steps heading. You can mark your own favorite elements by clicking the star icon.

Drag the “External Data Intelligence” on to the canvas from the left frame.
Creating Segments in External Data Intelligence App #
External Segments are groups of contacts that are grouped together based on criteria you specify. A segment defined in the External Data Intelligence app is dynamic based on implicit or explicit information about the contact residing in an external system (e.g. Salesforce). After you create a segment it can be used to drop Contacts into a Campaign or a Program.
To create a segment: #
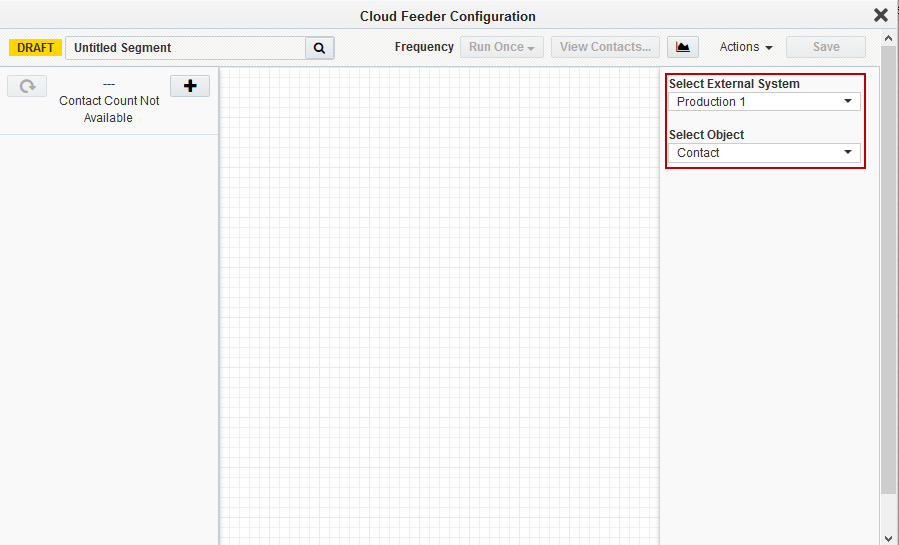
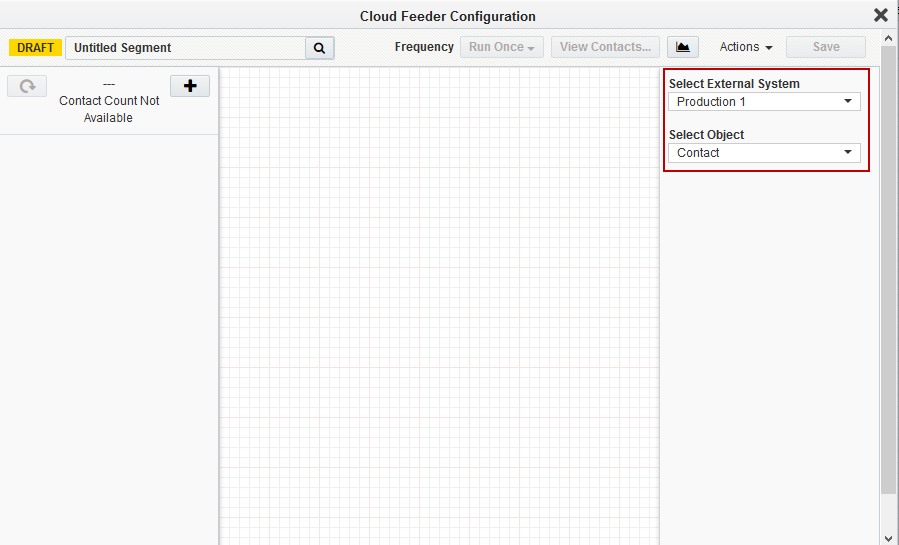
- Drop the External Data Intelligence step into a Campaign or Program.
- Select the External System against which the segment will be based up on.
- Select the Object against which the criteria will be based on.
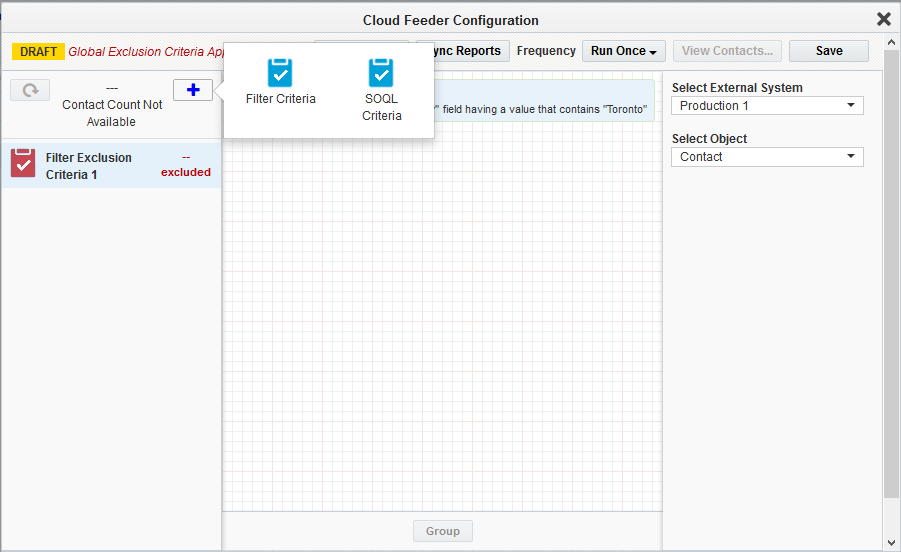
- In the left pane click Add
 . Then click on the following options.
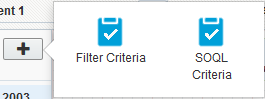
- Filter Criteria: Filter contacts based on data about the contact in the external system. For example, filter a lead with a status of ‘Qualified’ and linked to an opportunity in a stage of ‘Negotiation’. Filters are a powerful component of segmentation and you can include multiple filters to make sure you reach your target audience.
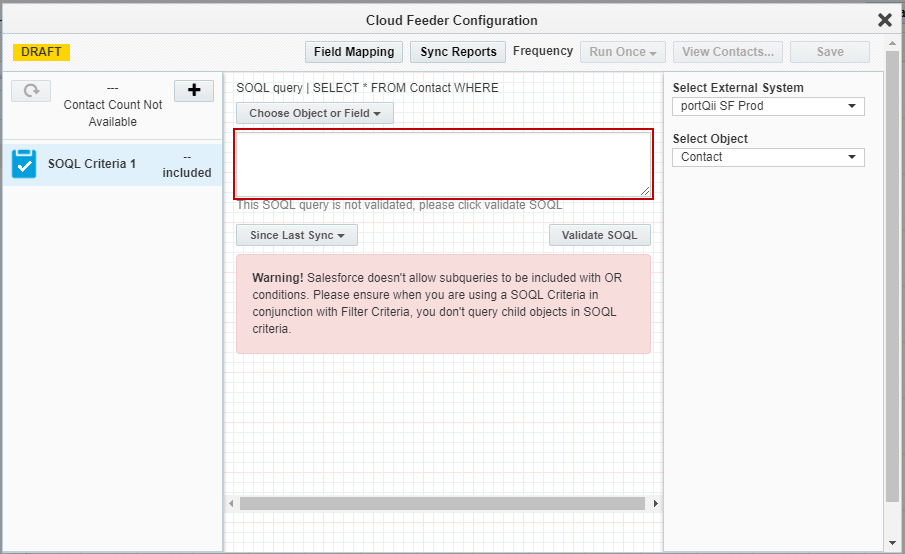
- SOQL Criteria: Filter contacts based on an advanced segment that is not possible to build via the graphical user interface.
NOTE: Users will need advanced knowledge in writing SOQL queries. For more information on how to use Saelsforce.com Query language refer to: https://developer.salesforce.com/docs/atlas.en-us.soql_sosl.meta/soql_sosl/sforce_api_calls_soql_sosl_intro.htm
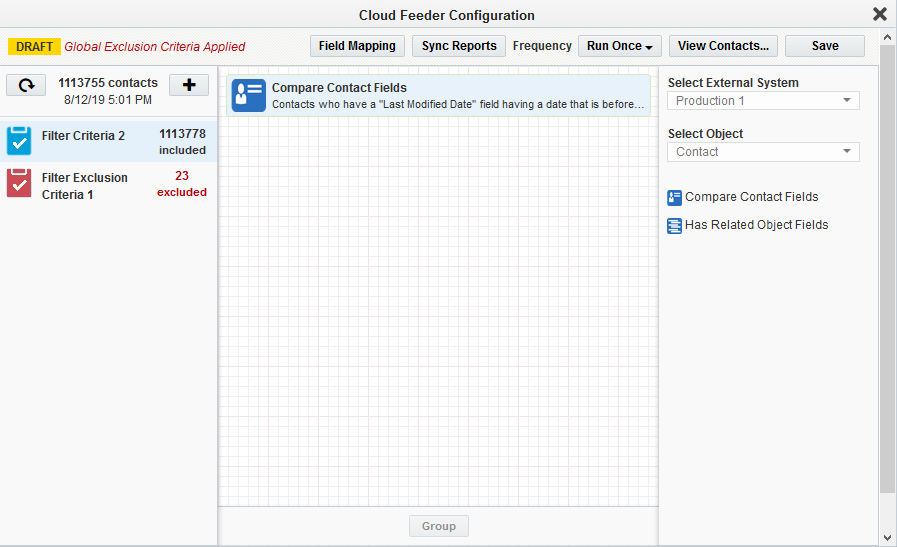
- Choose to build your filter criteria condition using fields from the base table or from tables related to the base external object selected.
- Name the segment providing a unique name and click Save once the filter criteria is defined.
After you save the segment, the External Data Intelligence app calculates the number of contacts in the segment once activated. You can click Refresh ![]() to see the latest totals.
to see the latest totals.
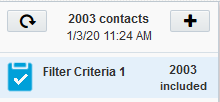
Tip: The more criteria you add, the longer it can take to refresh the segment totals. Each criterion must be evaluated against the entire contact database. So, the fewer criteria, the faster the segment totals can be returned.
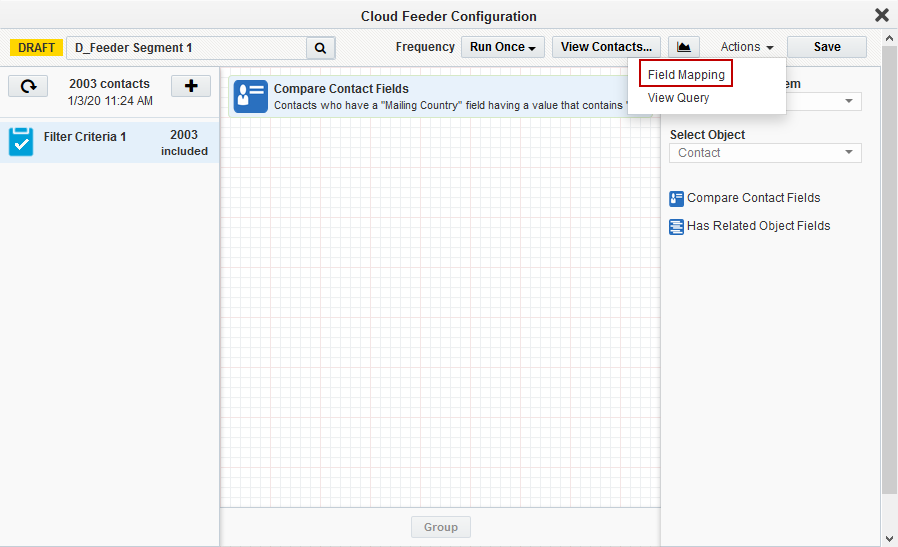
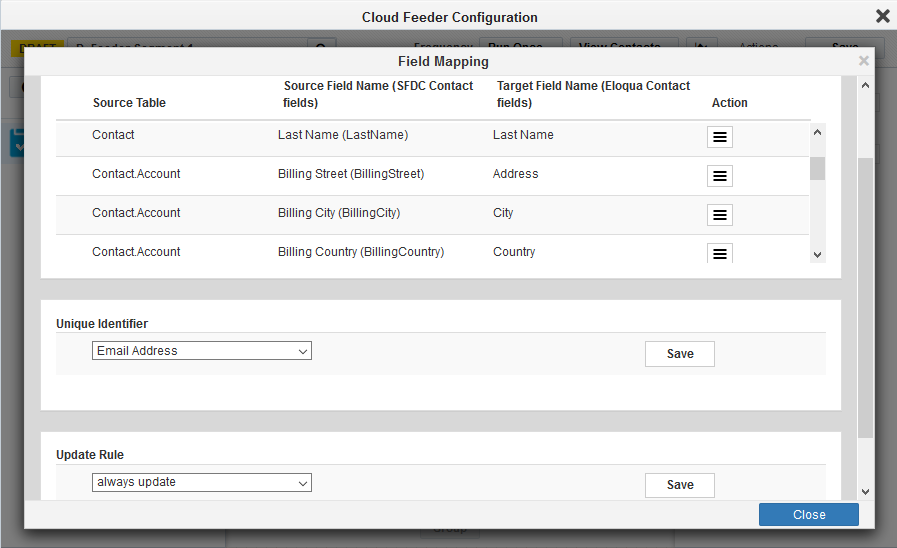
- Customise Field Mapping (add/delete) for the segment or let the default Field Mapping apply to Import file. You can change the Unique Identifier or Update Rule using the dropdown provided.
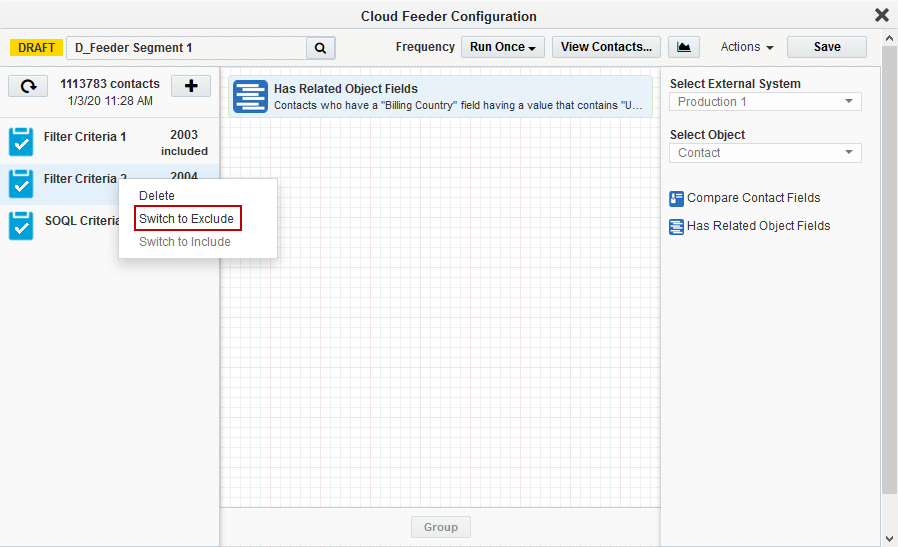
- Filter Criteria or SOQL Criteria can be switched to exclude/include. This will exclude/include the contacts from that criteria to be imported into Eloqua. Click Save once you have completed building the segment.
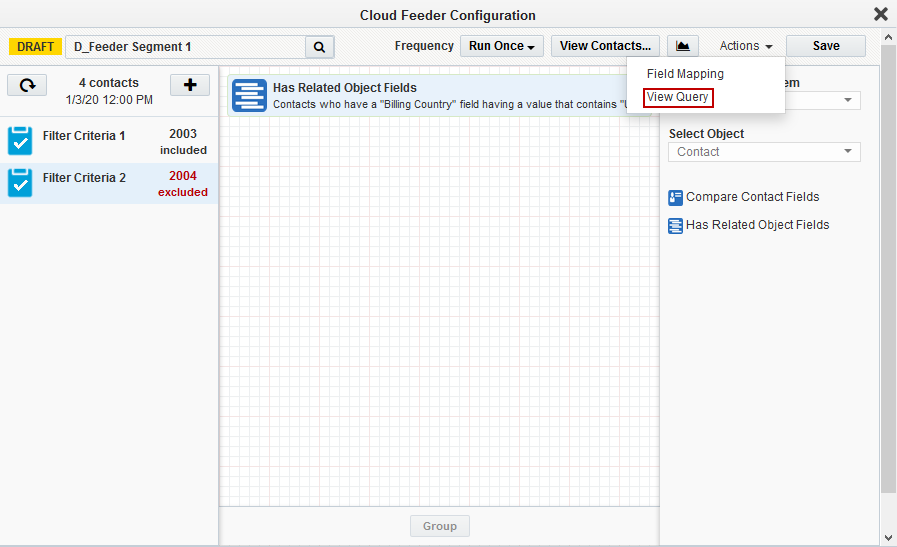
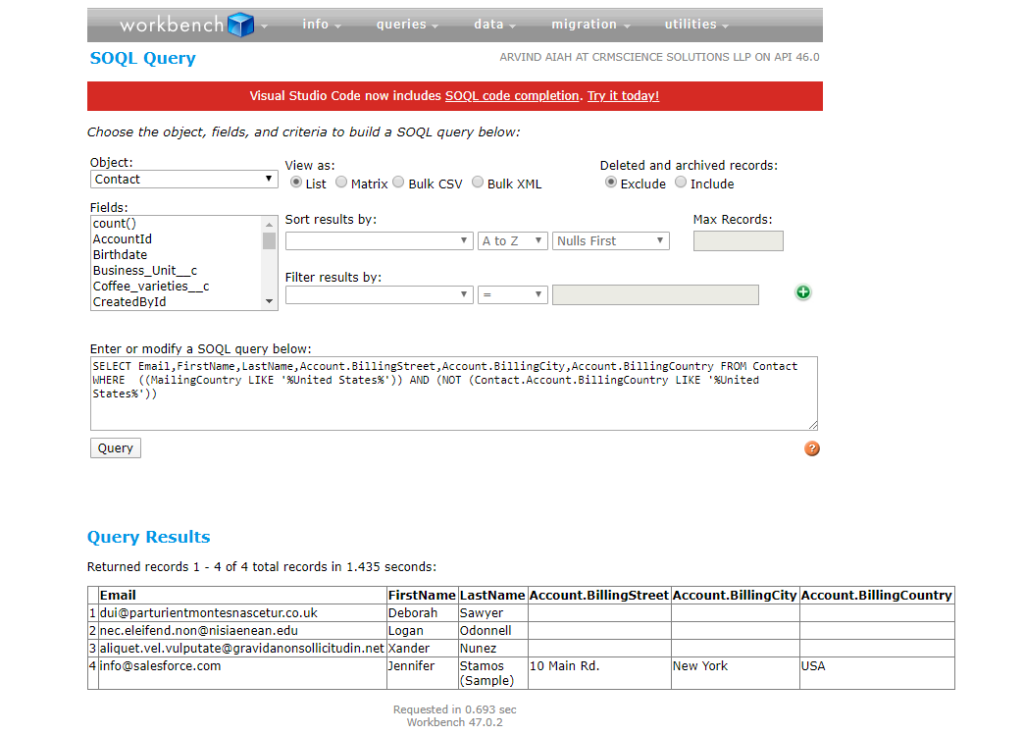
- Once the Feeder Segment is built, you can get the overall query using the ‘View Query’ feature. Clicking on ‘Copy Query’ button copies the query where you can paste it on the Salesforce Workbench to check the query results.

Adding Filter Criteria from Base External Object Fields #
You can use fields from the base object selected in your filter criteria to dynamically build your segment. For example, you can build a segment querying the Leads object where the Status is equal to ‘Qualified’.
To filter using base object selected: #
- In the External Data Intelligence campaign step click Add
 in the left pane, then click Filter Criteria
  .
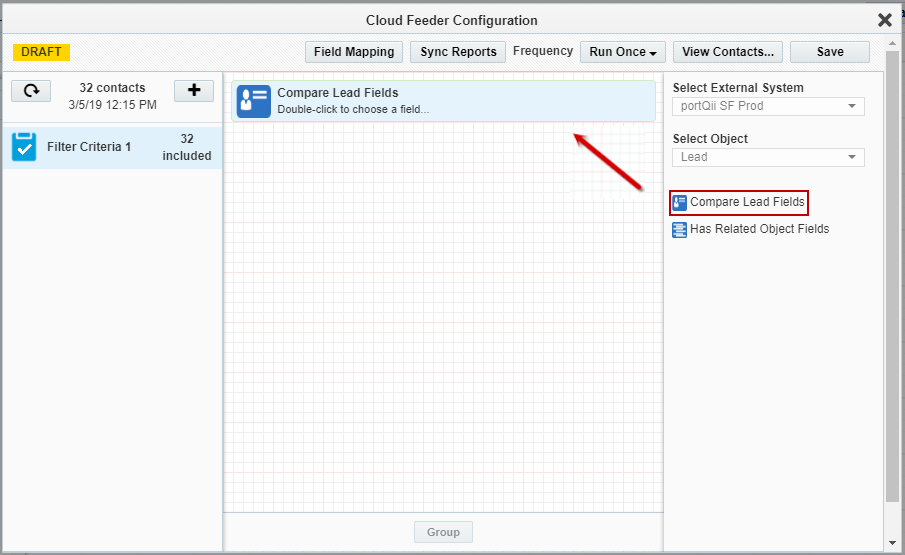
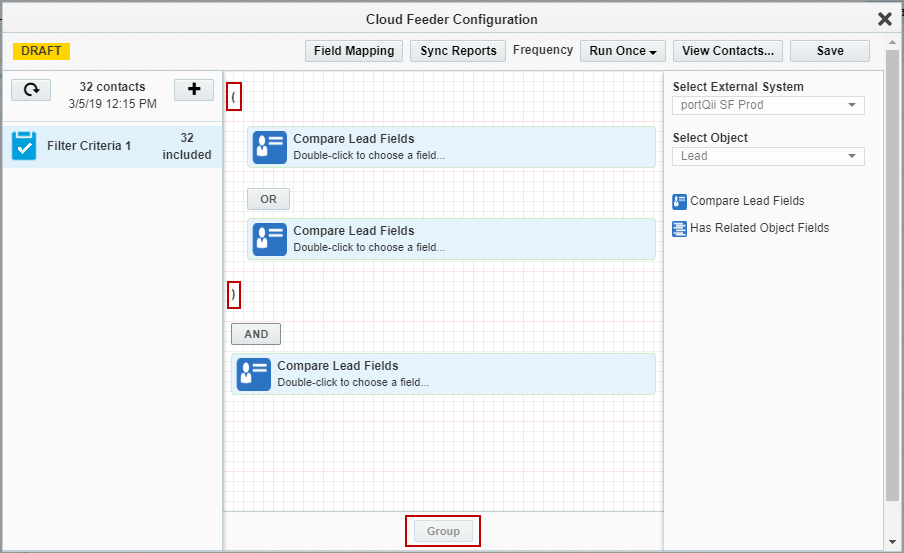
. - In the right pane double-click the first filter criteria. E.g. Compare Lead Fields.
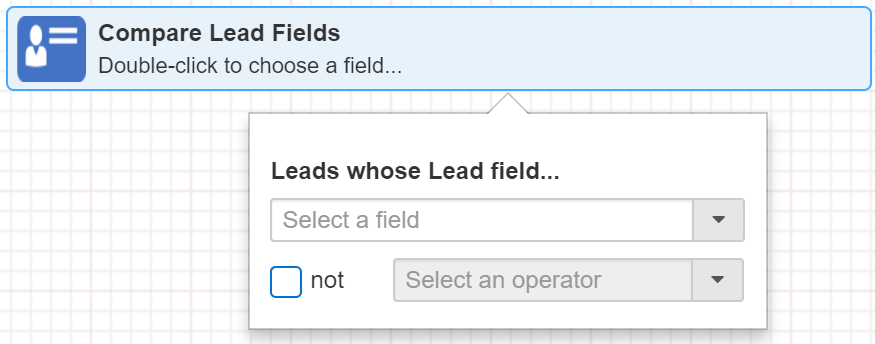
- Double-click the criteria you added to configure it. Click outside the window to close it.
- Add additional filters as needed. When you add filter criteria, you join the filters using a Boolean AND or OR comparison. To switch between AND or OR, click the operator label on the canvas.
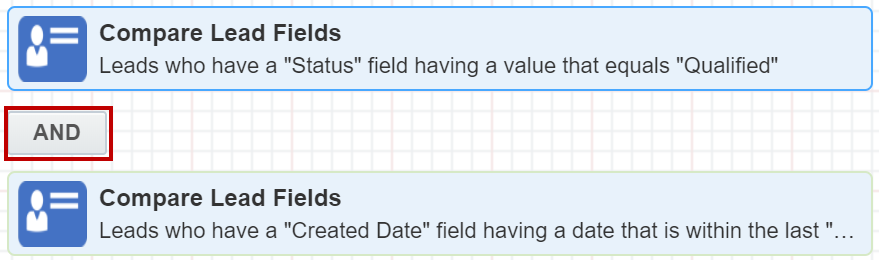
- To group the filters, click on the filter that you want to group and press Ctrl key and the filter that you want to add to the group. They get highlighted. Click on Group.
- Click Save.
Adding Filter Criteria from Related External Object Fields #
Adding Filter Criteria from Related External Object Fields
You can use fields from objects that are related to the base object selected in your filter criteria to dynamically build your segment. For example, you can build a segment querying the Leads objects where a Lead is associated to an Opportunity associated to an Account where Account Type = ‘Prospect’.
To filter using has related object fields selected: #
- In the External Data Intelligence campaign step click Add
 in the left pane, then click Filter Criteria
  .
. - In the right pane double-click the second filter criteria. E.g. Has Related Object Fields.
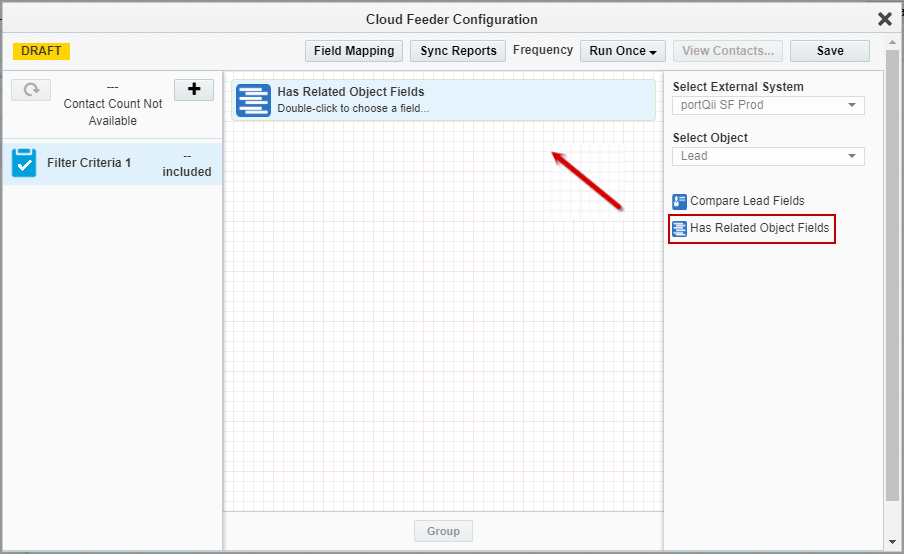
- Double-click the criteria you added to configure it. Click outside the window to close it.
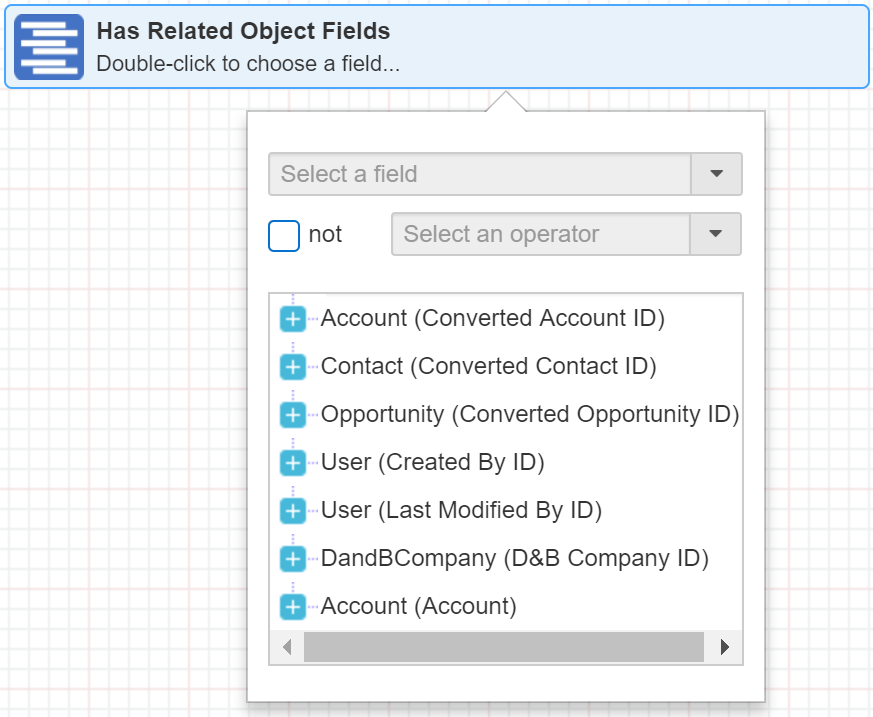
- Navigate the tree view control to locate the field in the right object using the right relationship connectors.
- You can group the criterias using Group feature. This is as explained in the previous section.
- Click Save.
Building Query using Since Last Sync #
You can use the ‘Since Last Sync’ in conjunction with other filter conditions that will bring only delta contacts after the first sync whenever the frequency is set to run more than once.
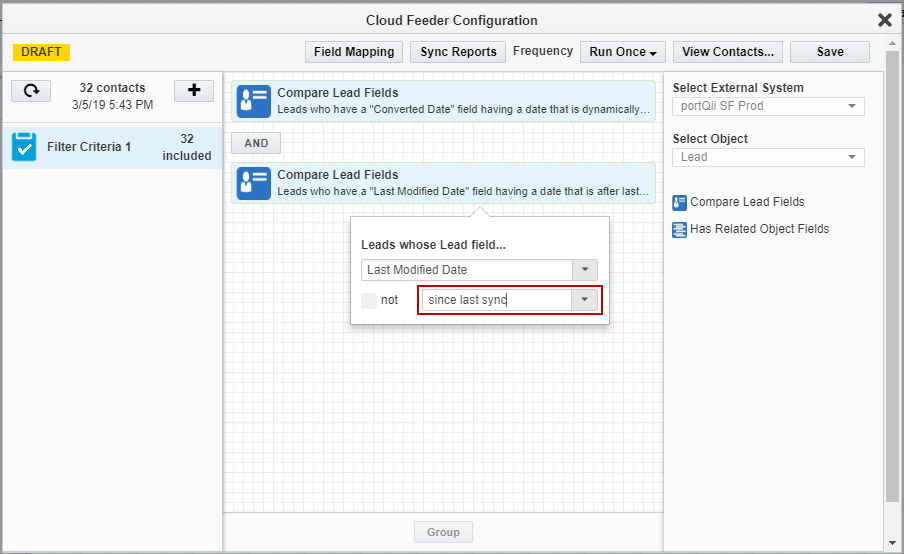
To add ‘Since Last Sync’ feature to the Filter Criteria: #
- In the External Data Intelligence campaign step click Add in the left pane, then click Filter Criteria.
- In the right pane double-click the first or second filter criteria. E.g. Compare Lead Fields, Has Related Object Fields.
- Double-click the criteria you added to configure it. Select any ‘Date’ field and click on the ‘Operator’ drop down to select ‘Since Last Sync’.
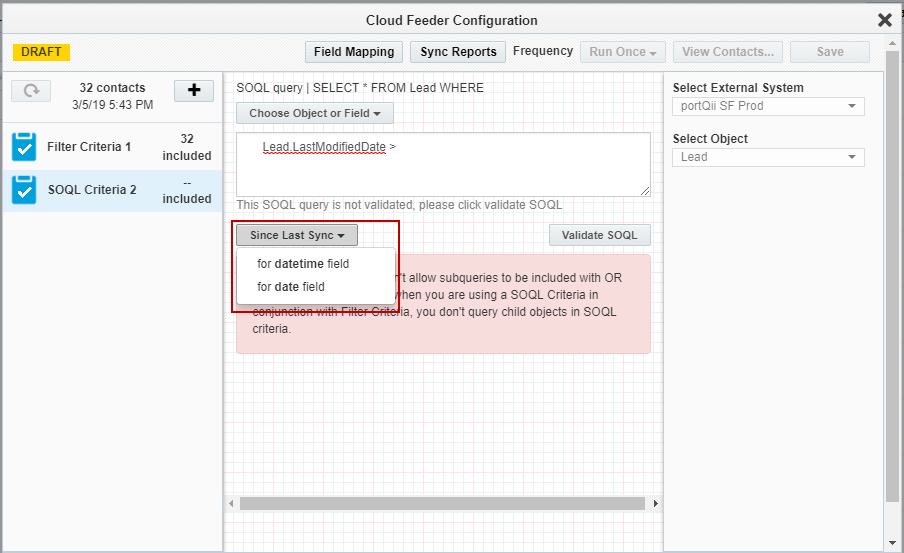
To add ‘Since Last Sync’ feature to the SOQL Criteria: #
- In the External Data Intelligence campaign step click Add
 in the left pane, then click SOQL Criteria
  .
. - Use Choose Object or Field to form the query. For the selected Object (in this case Lead), it’s related Parent Objects highlighted with the icon
 , alongwith it’s fields and Child Objects highlighted with the icon
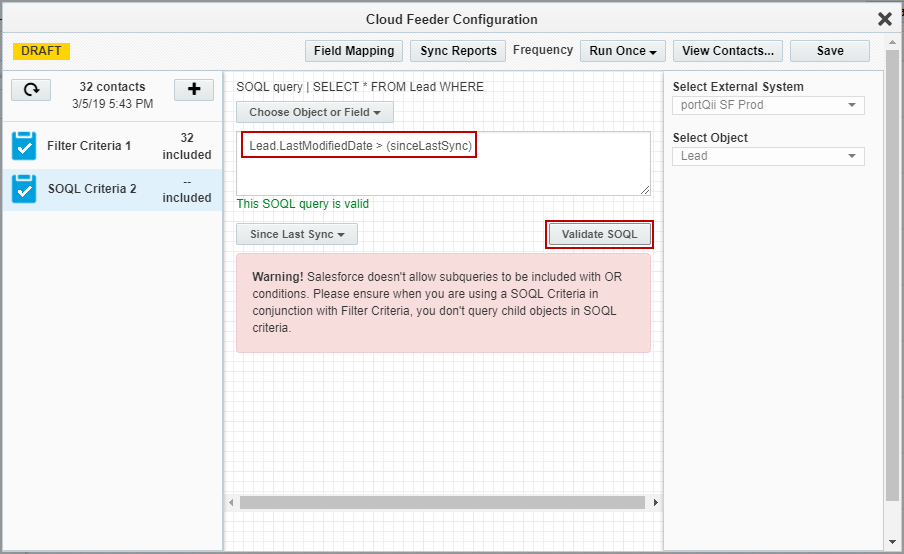
  , alongwith it’s fields are shown. The user can navigate the tree view control and click on the Date/Date Time field and click Insert to add the respective object and the field into the SOQL query textbox. User can then click on Since Last Sync for datetime field or date field which inserts the since last sync feature into the query. User can then click on Validate SOQL to check the validity of query before saving the segment.
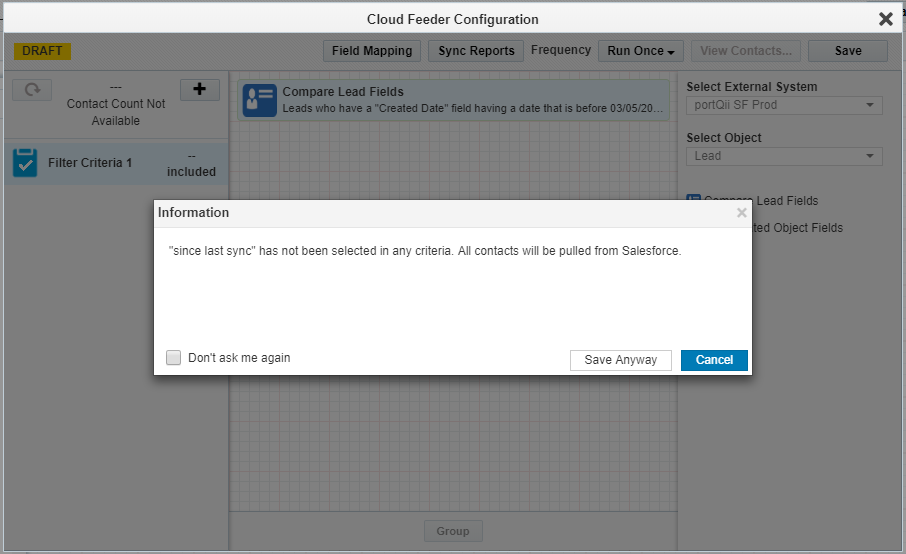
If ‘Since Last Sync’ feature is not added to the Filter/SOQL Criteria then the segment pops up an alert to the user suggesting to use the feature.
Adding Filter using Advanced SOQL #
You can use the advanced SOQL feature to create complex filter conditions that are not possible through the graphical user interface provided.
To filter using the advanced SOQL feature: #
- In the External Data Intelligence campaign step click Add in the left pane, then click SOQL Criteria .
- Use Choose Object or Field to form the query. For the selected Object (in this case Contact), it’s related Parent Objects highlighted with the icon , alongwith it’s fields and Child Objects highlighted with the icon , alongwith it’s fields are shown. The user can navigate the tree view control and click on the required field and click Insert to add the respective object and the field into the SOQL query textbox. User can then complete the query.

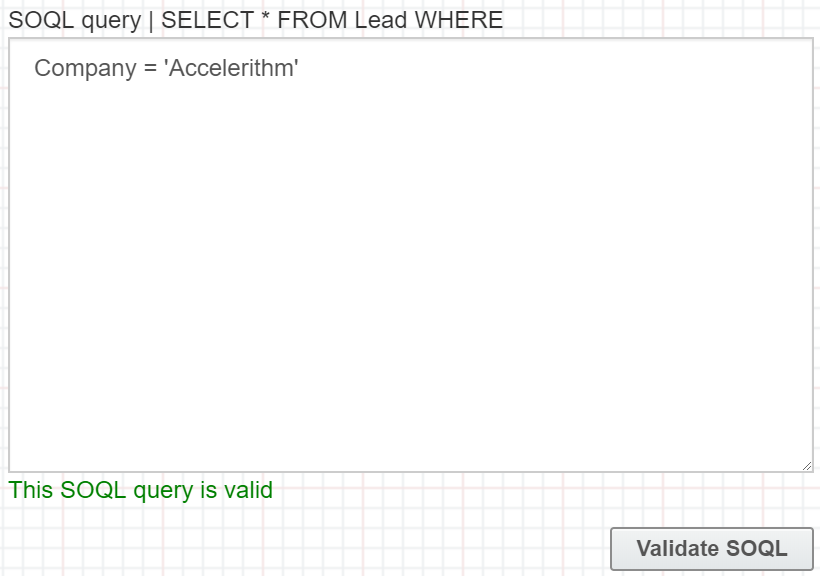
- Insert the WHERE clause component of the SOQL statement in the text box provided.
- Click Validate SOQL. If a valid SOQL statement was inputted, then the following message will be displayed.
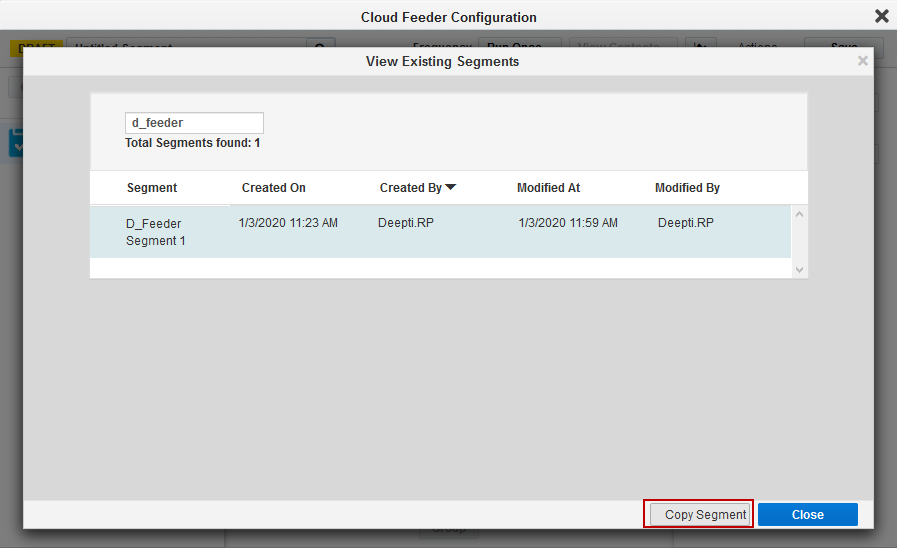
Creating Segments by copying Existing Segments #
After you create a segment it can be re-used to create a new Segment.
To re-use an existing segment: #
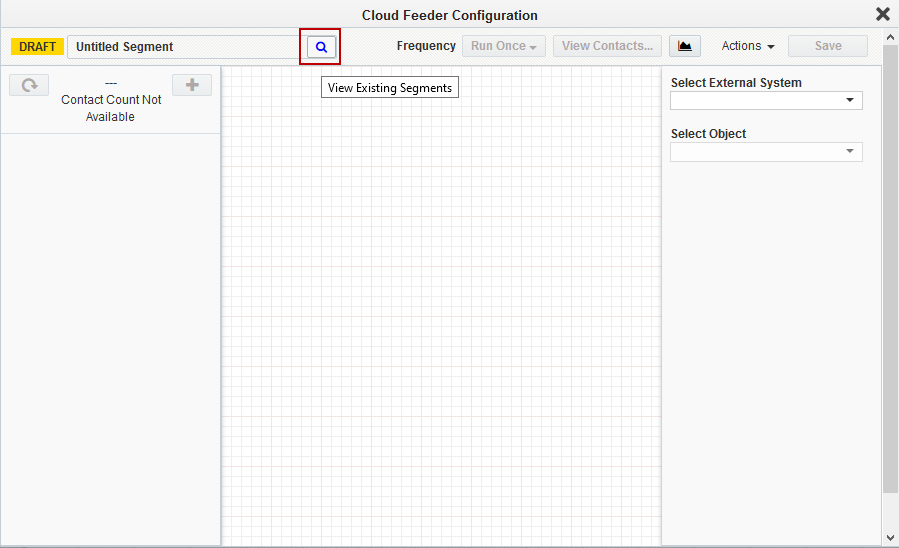
- Click on
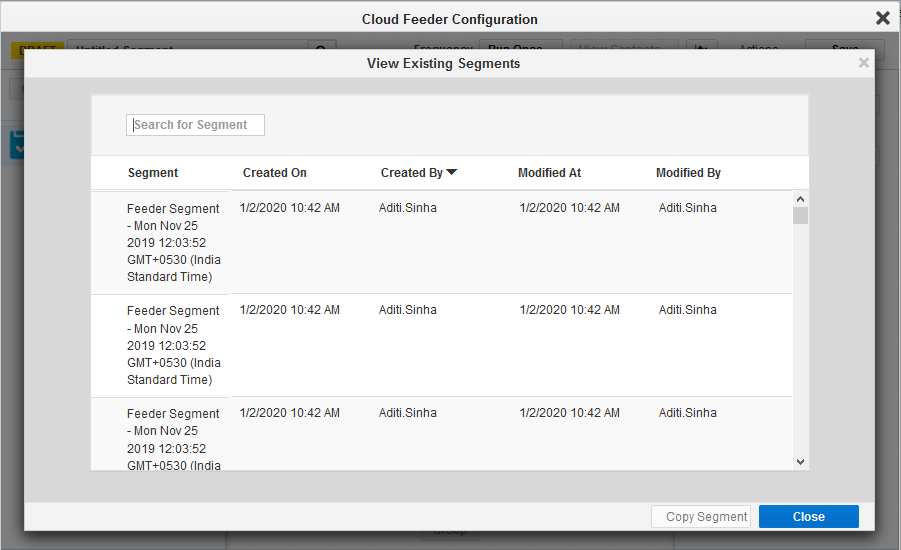
 to View Existing Segments. All the Segments are listed.
 - Search the required Segment using the Search box.
- Select the required Segment and click on ‘Copy Segment’.
- The selected Segment gets copied to the new Feeder Service.
- User can choose to update the Segment or keep the Segment as-is. However the Segment has to be assigned a new name and saved.
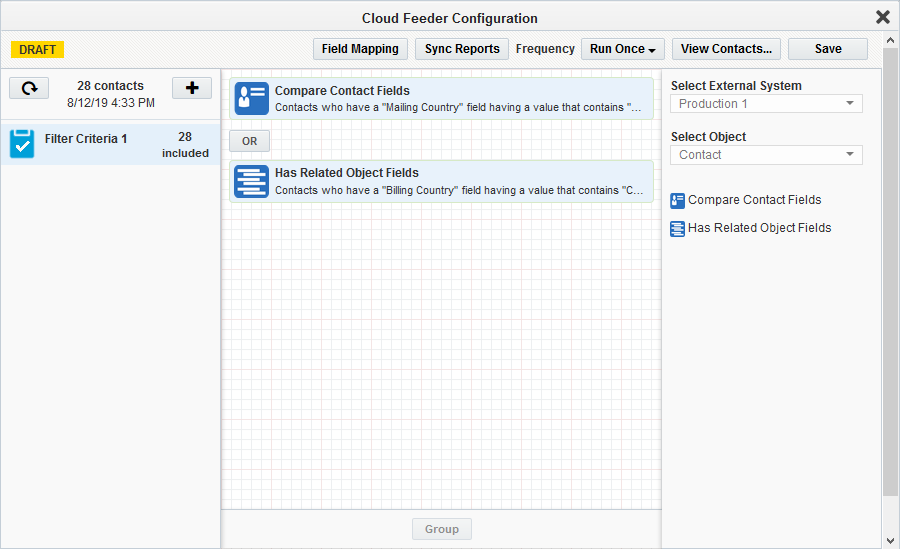
Working with Exclusion Criteria in Segments #
Screenshot shows a Segment
- When Exclusion Criteria is disabled in admin page OR
- Before Exclusion Criteria is applied to an existing Segment
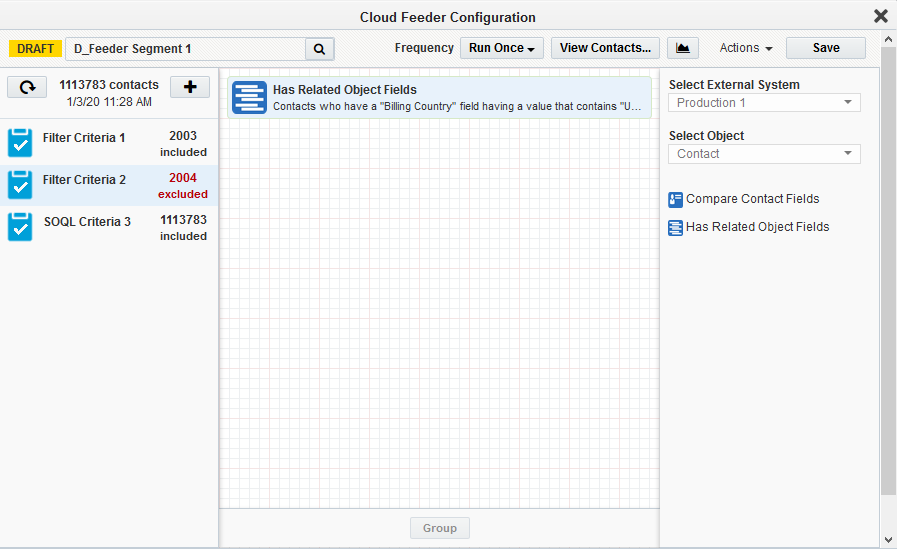
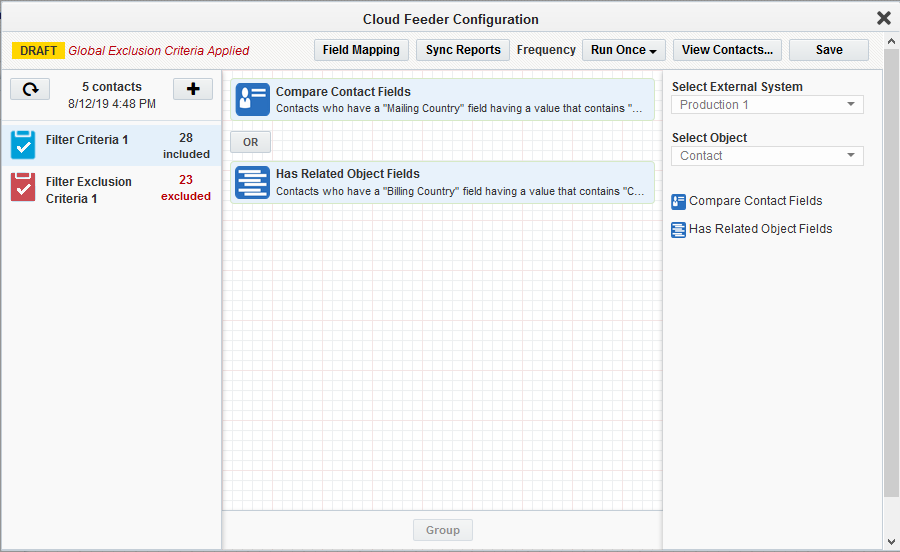
After applying Exclusion Criteria to an existing Segment, it appears as shown in the below screenshot:
When Exclusion Criteria is applied to a New Segment, it appears as shown below:
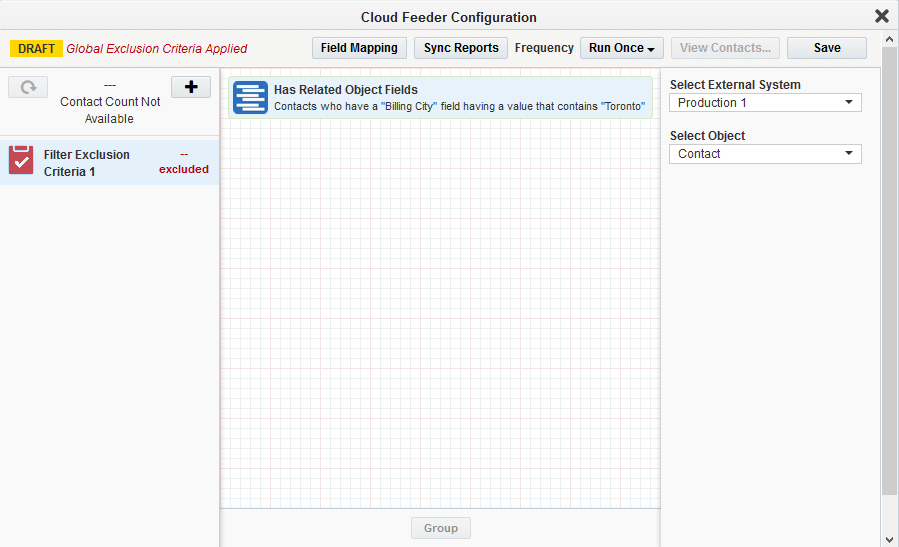
User can continue to build the New Segment with different criteria and click on Save. Exclusion Criteria will exclude the Contacts to be imported into Eloqua.
Batch and Blast vs. Always On Processing #
The External Data Intelligence app supports the use of the application in either a “batch and blast” campaign or an “always on” campaign (such as a nurture stream).
To configure whether a segment evaluates just once or whether it keeps on evaluating continuously throughout the life of the campaign: #
- Finish configuring the filter criteria in the External Data Intelligence app.
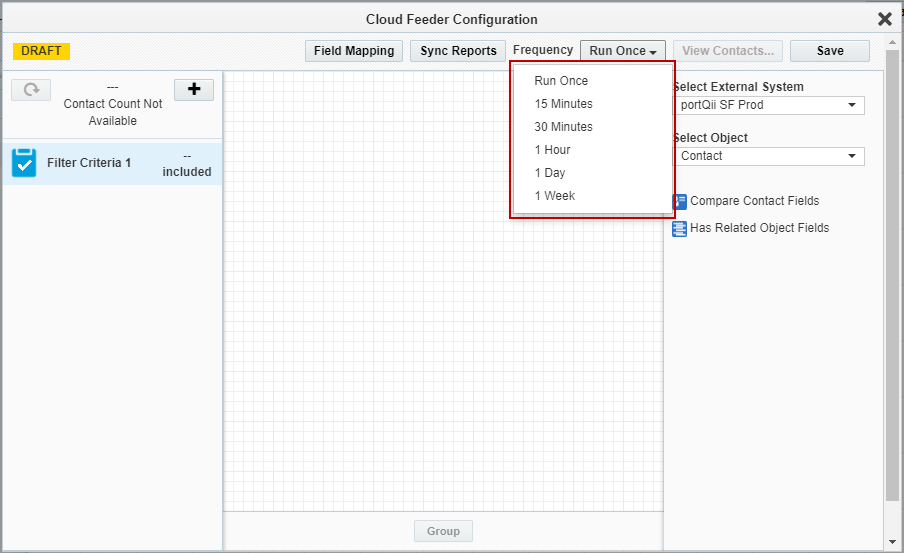
- Select Frequency from a drop-down.
- Run Once: Used in a batch and blast scenario. Will be executed just once on the activation of a campaign.
- Time Interval: Choose one of the time intervals available. The filter condition will be re-evaluated based on the time interval chosen.
NOTE: If a process from the previous interval run is still executing then the current interval process will be skipped.
Re-Import Data #
When we reactivate a campaign, the ‘Run Once’ feeder service used to automatically import the contact details into the campaign; this feature is now disabled.
If we want the contact details to be imported again, we now need to follow these steps:
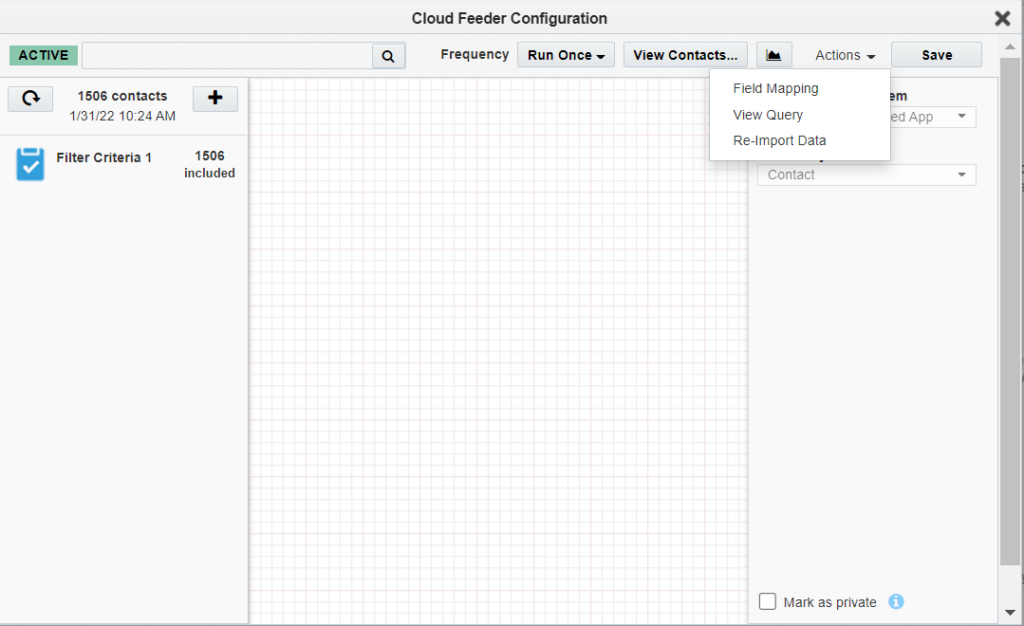
- Open the feeder service of the External Data Intelligence app.
- Feeder Service must be executed at least once for this feature to be available.
- Under the Actions tab click on Re-import Data.
NOTE: It used to be, that we had to deactivate the campaign to import contacts, but now we can import even when the campaign is active.
*There is one exception on the old active campaigns (campaigns which were active before this feature is made available) : Old campaigns will bring the contacts once again if they are reactivated; and after this import, any future campaign reactivations will no longer facilitate automatic import of contacts unless Re-import Dataoption is chosen by the user.
*If the Re-import Data option is chosen when the campaign is deactivated, then it will be effective immediately after the campaign reactivation.
‘Re-import data’ feature release dates :
- External Data Intelligence Salesforce – 27th Jan 2022
- External Data Intelligence Snowflake – 11th Feb 2022
Duplicate contact in feeder service #
Overview #
Duplicate contact rule is a helpful feature when users have multiple contacts in salesforce with matching query criteria and the same email address. Eloqua does not allow to import contacts with the same email address.
Configuration #
The Duplicate Contact Rule can be overwritten on EDI Feeder step
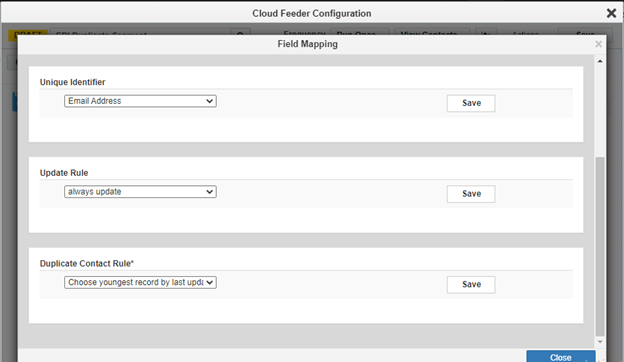
- Navigate to the field mapping.
- Select Duplicate Contact Rule.
There are Four Duplicate Contact Rule
- i. Import Everything: It will import all, all duplicates will not be going to flow.
- ii. Ignore all duplicates and do not import: It will remove all duplicates before importing to Eloqua.
- iii. Choose the youngest record by the last update date: it will import the latest modified record among duplicates to Eloqua.
- iv. Choose the oldest record by creation date: it will import the oldest created record among duplicates to Eloqua
Duplicate Contact Rule #
If the user has multiple contacts in Salesforce with matching query criteria and same email address, and the duplicate contact rule selected in EDI Admin or Feeder Level it will import contacts based on the selected Duplicate Contact Rule.
Search Contact #
Overview #
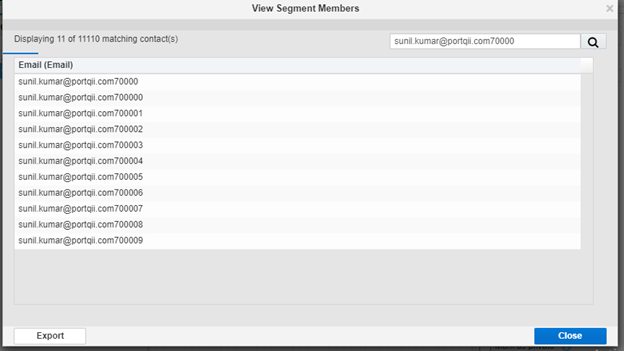
Search contact is a helpful feature when it comes to finding a contact in a larger volume. Users can view 100 contacts from salesforce in the feeder service for configured salesforce query, now we have added the search facility, where users can enter the email address and verify that this contact belongs to configured Salesforce query or not.
The Search Contact feature can be used in the following manner:
- Go to the EDI Feeder Service.
- Configure the Salesforce query and save the Feeder.
- Once saved View Contact button is enabled.

- After the view contact popup is opened, the user has to enter an email that the user wants to search.

- This search will return all records from salesforce based on configured salesforce query.
Eloqua Picklist in EDI Snowflake Filter Criteria #
The following feature allows user to choose an Eloqua picklist to query the snowflake data. This will bring all the contacts from snowflake whose configured field value is in the selected Eloqua picklist. We are allowing the ‘in Eloqua picklist’ capability to Text and Number data types.
Below are the easy steps to configure this feature in your Feeder/Decision app. There is no Admin configuration needed, user can configure it directly on the Feeder/Decision app.
Using Eloqua picklist in snowflake Filter criteria #
- In Feeder/Decision service filter criteria, select the field you want to add the Eloqua picklist.
- Select ‘in Eloqua picklist’ option from Operators.
- Search for the Eloqua picklist you want to use in the filter.
- Save the Feeder/Decision service.
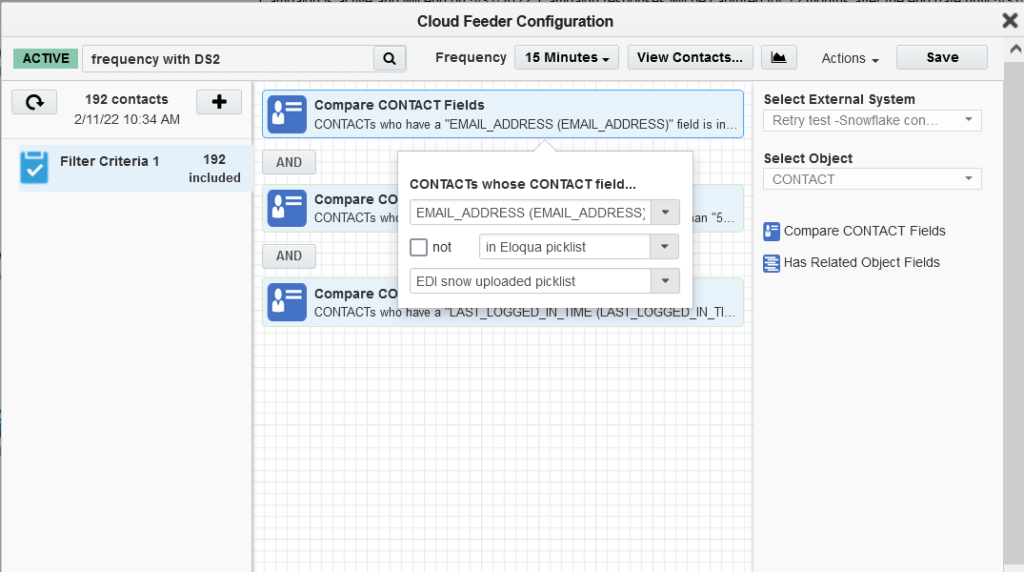
This selection will bring all the contacts from snowflake whose configured field value in the Eloqua picklist selected.
Points to note #
Snowflake has limitation of 16K values inside the ‘IN’ query. Hence the maximum number of picklist values allowed on the Eloqua picklist is less than 16k. For the picklists having option values beyond this limit will throw an error.
How to use an Eloqua segment as a filter criterion in EDI for Snowflake. #
When creating a feeder or a decision service in EDI, there are times when we want to add a criterion that says: include only if the contacts are found in a certain Eloqua segment. EDI is now capable of doing that.
We can also use this feature to narrow an already existing Eloqua segment with data from Snowflake.
Note: This premium feature is license-based – please contact sales@portqii.com to purchase it.
Configuration #
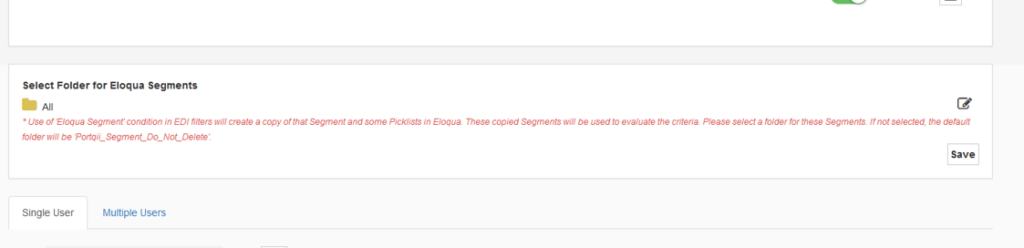
This feature needs a working-folder where the app can cache it’s memory. Deleting this folder can result in malfunction of this feature. An Eloqua admin needs to select such a folder from the app’s admin-configuration page. Here’s how to do that:
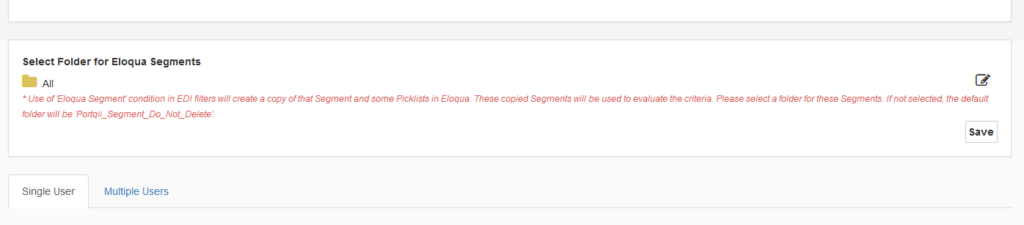
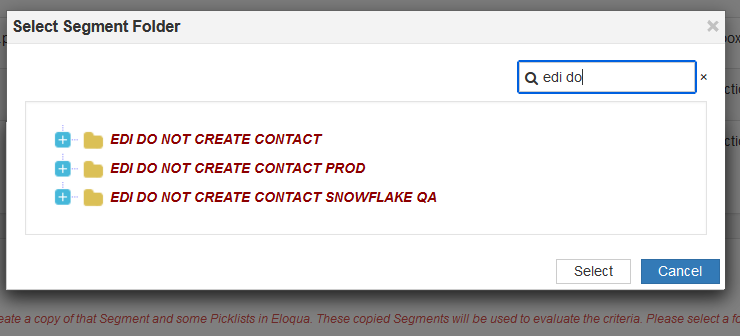
Click on the edit icon to view and search the existing folders in Eloqua.
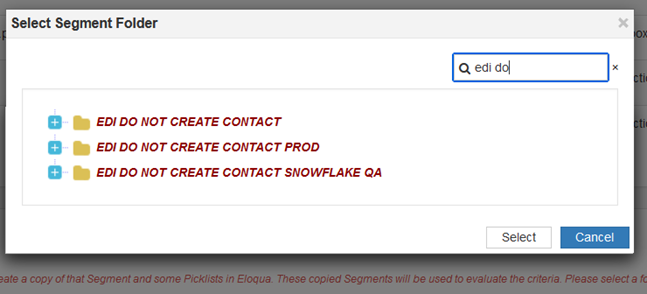
Folders can be expanded to show the child folders by clicking on the + sign. Select the desired folder and save it.
After the campaign activation, EDI processes the contacts by creating a copy of the chosen segments and related picklists. All the segments which will be created as a part of contact processing in EDI will be created in the working-folder and will be cleaned up frequently (every 2 days).
If the working-folder is not selected, then EDI will create its own folder named ‘Portqii_Segment_Do_Not_Delete’ and use that as the working-folder.
Steps to add an Eloqua segment to the EDI filter #
- Open the Feeder/Decision service in the External Data Intelligence application.
- Build your snowflake query.
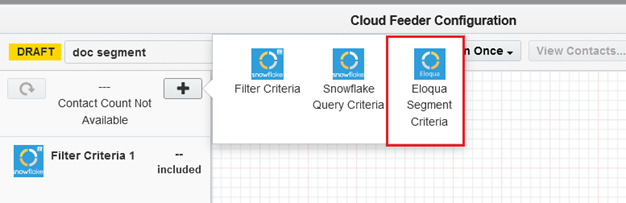
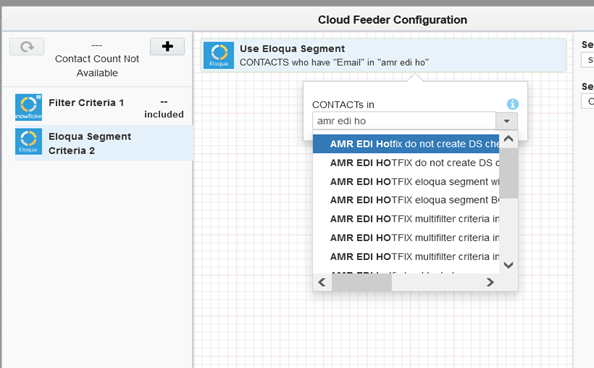
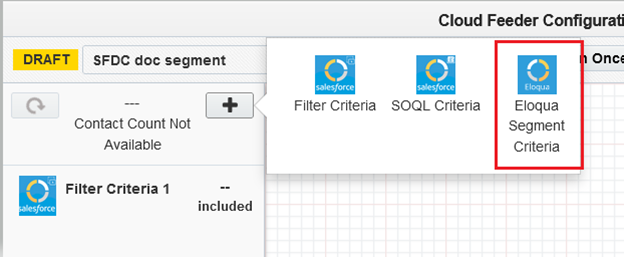
- To start adding an Eloqua segment as the filter criteria, click on the + symbol and choose ‘Eloqua Segment Criteria’.
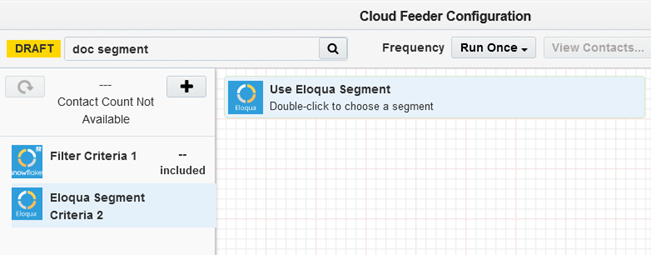
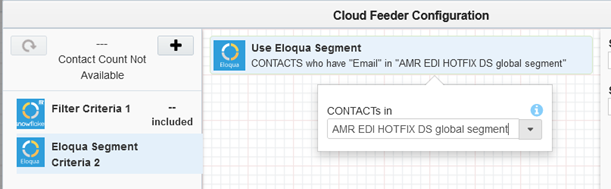
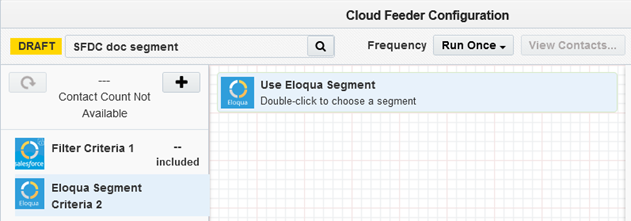
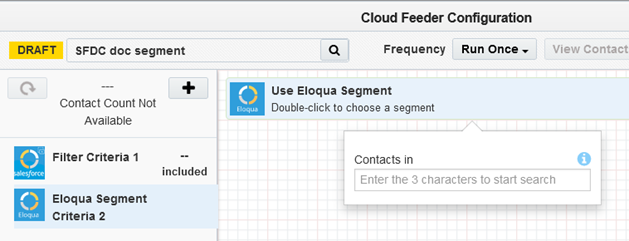
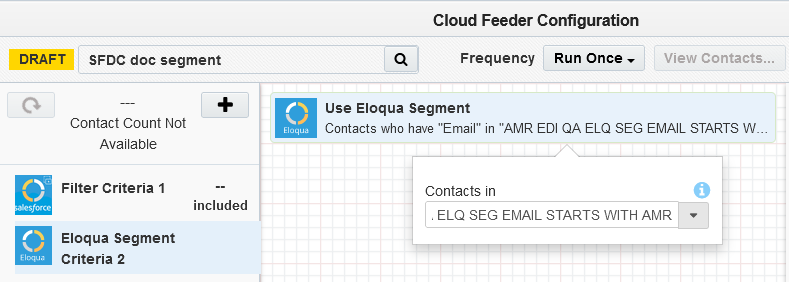
- Clicking on the added ‘Use Eloqua Segment’ option will open the filter to add the Eloqua segment. Double click the filter to open a search box.
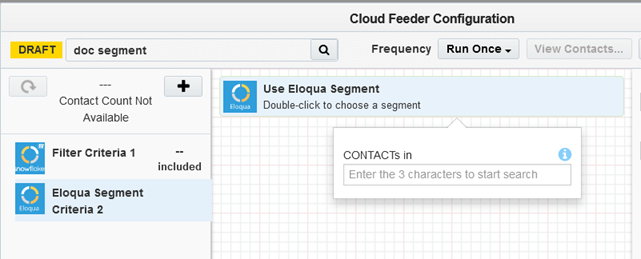
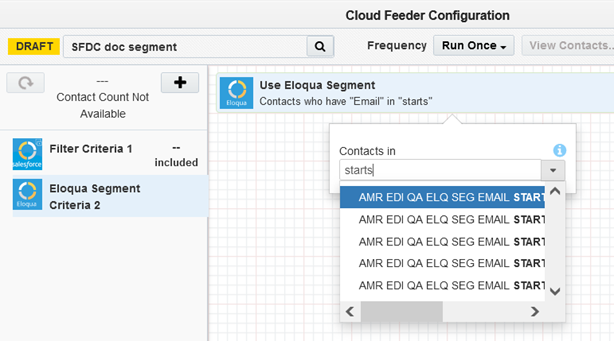
- Search for the Eloqua segment by typing the search text and select the desired segment from the list; and then save the Feeder/Decision service.
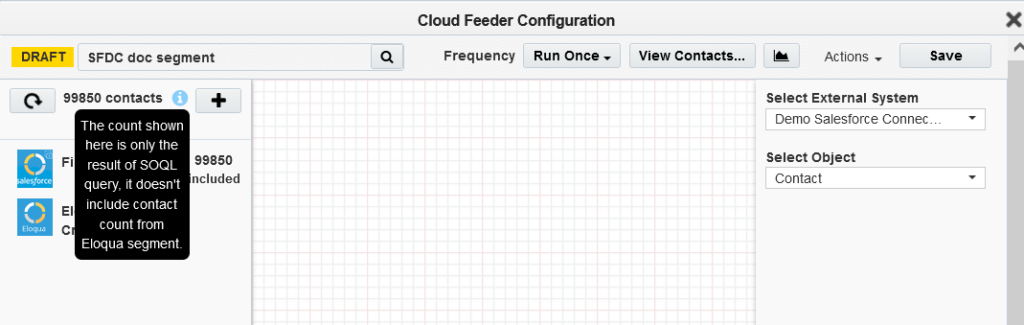
Note: The contact-count visible on the feeder after the save is the count resulting only from the snowflake query. The actual contact count will be shown once the process of combining the EDI filter criteria with Eloqua segment happens (after the campaign activation).

Limitations #
- The contact count visible to the user is the count resulting from the snowflake query only, it cannot show the combined result of snowflake and Eloqua segment contact count.
- Only one Eloqua segment can be added to the EDI as a filter criterion.
- The Eloqua segment which will be used in EDI can contain Filter criteria and Shared filters. Other filter options like Individual Contacts, Shared Lists, Upload Contact are not supported. Segments with no filter criteria is also not supported.
- Eloqua segments with Quick Lists may render inconsistent results. It’s recommended that we don’t use them for now – we are working with Eloqua to improve this feature.
- EDI will not keep a track of the Eloqua segments and picklists created to process the contacts – they will be cleaned up, so don’t depend on the working-folder.
How to use an Eloqua segment as a filter criterion in EDI for Salesforce. #
When creating a feeder or a decision service in EDI, there are times when we want to add a criterion that says: include only if the contacts are found in a certain Eloqua segment. EDI is now capable of doing that.
We can also use this feature to narrow an already existing Eloqua segment with data from Salesforce.
Note: This premium feature is license-based – please contact sales@portqii.com to purchase it.
Configuration #
This feature needs a working-folder where the app can cache its memory. Deleting this folder can result in malfunction of this feature. An Eloqua admin needs to select such a folder from the app’s admin-configuration page. Here’s how to do that:
After the campaign activation, EDI processes the contacts by creating a copy of the chosen segments and related picklists. All the segments which will be created as a part of contact processing in EDI will be created in the working-folder and will be cleaned up frequently (every 2 days).
If the working-folder is not selected, then EDI will create its own folder named ‘Portqii_Segment_Do_Not_Delete’ and use that as the working-folder.
Steps to add an Eloqua segment to the EDI filter #
- Open the Feeder/Decision service in the External Data Intelligence application.
- Build your Salesforce query.
- To start adding an Eloqua segment as the filter criteria, click on the + symbol and choose ‘Eloqua Segment Criteria’.
- Clicking on the added ‘Use Eloqua Segment’ option will open the filter to add the Eloqua segment. Double click the filter to open a search box.
- Search for the Eloqua segment by typing the search text and select the desired segment from the list; and then save the Feeder/Decision service.

Note: The contact-count visible on the feeder after the save is the count resulting only from the salesforce query. The actual contact count will be shown once the process of combining the EDI filter criteria with Eloqua segment happens (after the campaign activation on Sync reports).
Limitations #
- The contact count visible to the user is the count resulting from the salesforce query only, it cannot show the combined result of salesforce and Eloqua segment contact count.
- Only one Eloqua segment can be added to the EDI as a filter criterion.
- The Eloqua segment which will be used in EDI can contain Filter criteria and Shared filters. Other filter options like Individual Contacts, Shared Lists, Upload Contact are not supported. Segments with no filter criteria are also not supported.
- Eloqua segments with Quick Lists may render inconsistent results. It’s recommended that we don’t use them for now – we are working with Eloqua to improve this feature.
- EDI will not keep track of the Eloqua segments and picklists created to process the contacts – they will be cleaned up, so don’t depend on the working-folder.
Caution #
The Salesforce feeder service/decision service that uses this feature (Eloqua segment as a filter criterion) usually takes time to process the records. For example: Importing one million records using a feeder service takes about three hours, so we need to factor this into our planning.