To modify configuration settings, navigate to Apps, select your app, and click the Configure icon (The Gear icon)
| NOTE | Selecting the Reinstall icon The app will be unavailable for all users during the reinstall. |
Launch Configuration Screen #
To configure the application in an Oracle Eloqua instance, perform the following steps:
- Log into the Eloqua instance in which the application is installed on.
- Navigate to Setup ->AppCloud Catalog
- Locate the application labeled “Transporter Sync”
- Navigate into this application and click on the “Settings” icon to configure the application.

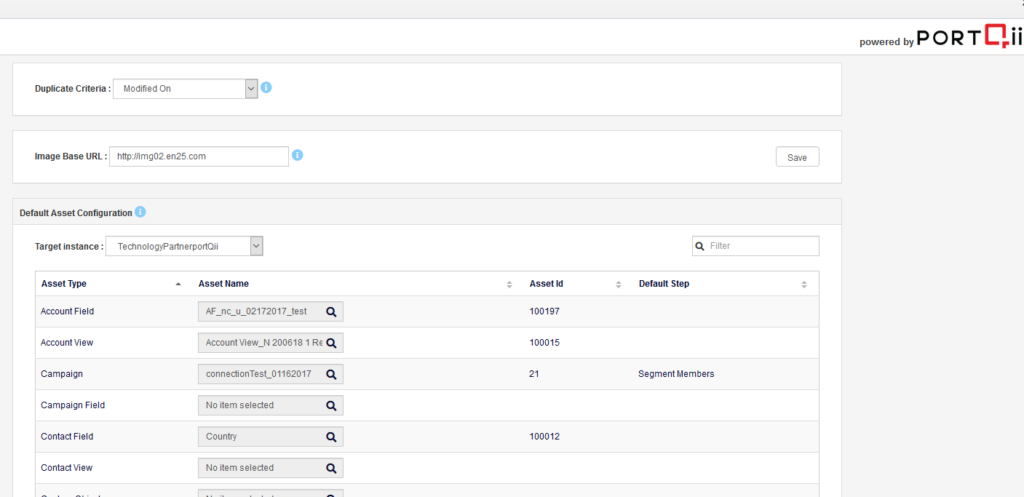
- This will bring up the configuration page as shown below.

Duplicate Asset Configuration #
When an asset exists in both source and target instance, the application needs to decide if the source asset should be synced or the target asset be retained. This configuration provides the user to choose one of 2 options for the application to handle duplicate assets
- Created On:: The asset that is created earlier will be the master asset when this option is selected. So if the asset in source instance was created earlier, the sync will move the asset from source to target. Otherwise the asset sync will be skipped and asset in the target instance will be retained.
- Modified On: The asset that is modified last will be the master asset when this option is selected. So if the asset in source instance was modified last, the sync will move the asset from source to target. Otherwise the asset sync will be skipped and asset in the target instance will be retained. This is the default option used by the application when no selection has been made.

Image Configuration #
This configuration allows Elouqa admin to provide a valid base URL specific to each instance.

Default Asset Configuration #
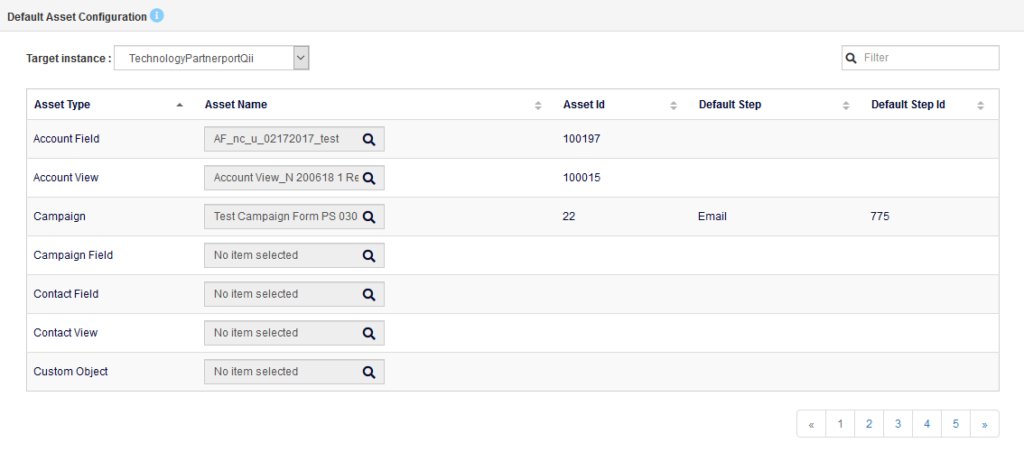
Default asset configuration is an important configuration that is used in scenarios where the application can not create an asset in the target instance. In such scenarios, the application will check this configuration to see if there is an asset that is configured for that asset type and use that asset wherever needed. While configuring default asset for a campaign, there is an additional step to configure the default step for the campaign. The application allows configuring one default asset for each asset type for each Eloqua instance.

To configure a default asset,
- Select the target instance.
- Click on the search icon for the asset type you want to configure the default asset.
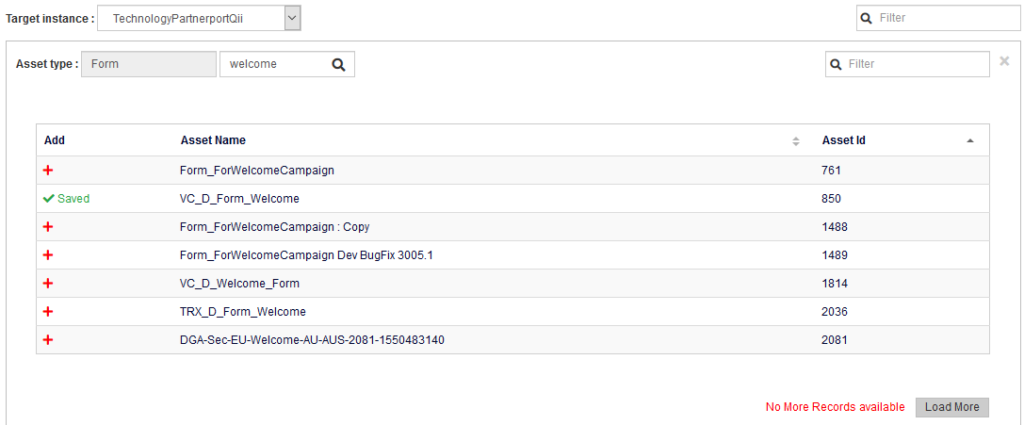
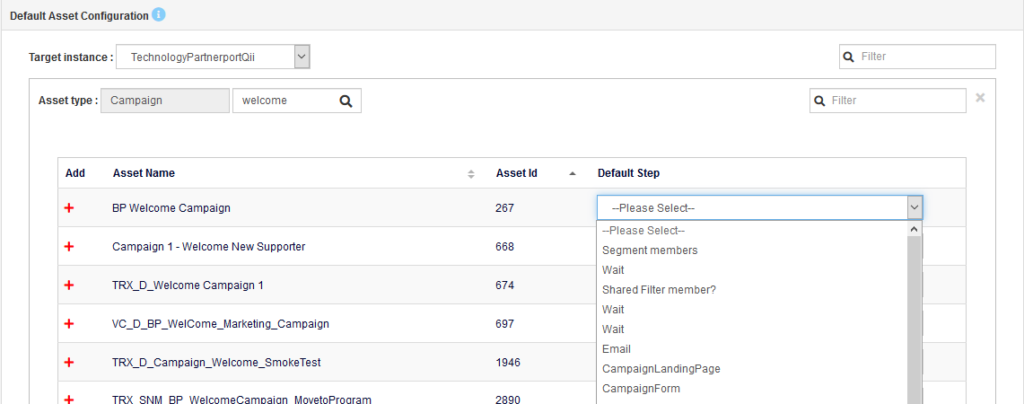
- A search field for the asset type will appear on top. Enter minimum three characters to search for an asset and hit search.
- Select the asset that is returned by the search. If required, select the filter option or Load More to browse for more assets.


- If the asset type is campaign, after selecting the campaign the user will need to select a step that will be marked as a default step.

Microsite Configuration #
While syncing a Landing Page asset, the application needs a microsite that is valid for the target instance. This configuration allows the users to configure the correct microsite for the target instances. To configure a microsite, select a microsite from the Microsites drop-down for each instance shown under the Microsite Configuration.

Email Configuration #
While syncing an email asset, the application needs to replace the From Email and Reply To Email details from source with valid values that work for target instance. This configuration allows the users to configure the values for the target instances. To configure the values, simply provide the Sender Name, Sender Email Address, Reply to Name and Reply To Email Address values for each target instance.

Switch Configuration #
Switch Assets During Deployment #
If the user wants to remove or replace the child assets in the target instance, the application provides an option to define such assets to be replaced by child assets from target instance. The administrator can define a mapping between source child assets and target child assets.
Configuring the Mapping in Admin page #
- Go to the Transporter Sync Admin settings. Scroll down to get the Switch settings.
- Select the target instance and asset type. Administrator must select the target instance before initiating the search for the target asset. Source instance will be defaulted to the current instance admin is logged in.
- Search the source asset name in the search box and select the asset you want to add the mapping.

- Search for the target asset. The assets displayed on target asset search are the assets with the matching source asset data type. Select the asset you want to map and click on ‘Add’.

- This will save the mapping to the table below.

This means, if a form is being moved from source instance to target and the form has Automation_CF_Text_Annotation contact field, then Automation_CF_Text_2 contact field of the target will be associated to the form.
Points to note #
- Transporter Sync Supports one-to-one mapping of source and target assets. Hence one asset from source instance can only be mapped to one asset of target instance.
- At present the asset type that is supported in Switch is replacement of Contact fields inside Form. Support for other asset types will be available in future releases.
- Support for ‘Remove’ action will be implemented in future releases.


